slideyfoot.com | bjj resources

 Home
 Contact
 Reviews
 BJJ FAQ  Academy

This website is about Brazilian jiu jitsu (BJJ). I'm a black belt who started in 2006, teaching and training at Artemis BJJ in Bristol, UK. All content ©Can Sönmez

20 April 2016

20/04/2016 - Teaching | Women's Class | Maintaining Mount

Teaching #497
Artemis BJJ (MYGYM Bristol), Can Sönmez, Bristol, UK - 20/04/2016

There are two basic types of mount to choose from, which I call low and high. Once you've achieved mount, I find that low mount provides the most control. First off, you want to immobilise their hips, as their main method of making space is to bridge up forcefully.

Bring your feet right back, threading them around their legs to establish two hooks: this is known as a grapevine. Alternatively, you can also cross your feet underneath (or just near, depending on your flexibility and leg length) their bum, which has the advantage of making it much harder for them to push your hooks off. Your knees are ideally off the ground, to generate maximum pressure. How far off the ground they are depends on your dimensions: the key is getting loads of hip pressure. Another option, which I learned from Rob Stevens at Gracie Barra Birmingham, is to put the soles of your feet together and then bring your knees right off the floor.

Whichever option you're going for, thrust those hips into them. It's important to get into a position where you can thrust your hips down, rather than getting bunched up so your bum starts going into the air. Use your hands for base, where again you have a couple of options. Either have both arms out, or put one under the head (remember, you can always remove it for base if you're really getting thrown hard to that side) while the other goes out wide for base.

Try to grip the gi material by their opposite shoulder, or even better, by the opposite armpit. Keep your head on the basing arm side, loading up your weight there. If they're bridging hard, you can switch from side to side, lifting their head slightly and bringing your other arm under, meaning your remaining arm bases out to the other side.

To do the trap and roll/upa escape, they will need to get control of your arm. So, don't let them grab it and crush your arm to their side. Instead, swim your arm through, like Ryron and Rener demonstrate in the third slice of the third lesson in Gracie Combatives. Be sure to do it one at a time, or you may get both arms squashed to your sides.
_____________________

Teaching Notes: There was a new person in class tonight, but we were able to fit in both low mount and some details on high mount. Like I was saying a couple of weeks ago, I have been moving towards Saulo's version of the high mount, which is more upright than I normally play mount, a hand in the collar.

With the transition to high mount, interestingly there was some discussion of there being an element of pain compliance here, which I hadn't noticed before. People were saying that pressing into the shoulders can pinch into the muscle up there, so that's something for me to keep in mind. It's not meant to be something based on pain, but leverage: I'll have to experiment with hand placement on that.

19 April 2016

19/04/2016 - Open Mat | More drilling from seminar

Class #714
Artemis BJJ (MYGYM Bristol), Can Sönmez, Bristol, UK - 19/04/2016

Once again, I ran through the closed guard material from the seminar (I'll have that up soon, hopefully: I'm writing this up a week later, still catching up). The choke off a scissor sweep was possibly the most interesting technique. You go for a scissor sweep, but it's blocked. So instead, Kick out the knee that was across, then clamp it back over their shoulder. Keeping your fist in the collar, put your legs into a sort-of armbar position, then squeeze. If you don't get that, the armbar is right there, if they pull their arm out, you can switch to an omoplata. I think this could work especially well for Simon, as like Jamie, he's long-limbed. :)

I'm not certain it will be quite as successful for short legged people like me, and I'm also wondering how much of it is a pain-compliance technique. Still, I'll keep playing with this.

18 April 2016

18/04/2016 - Teaching | Mount | Trap & Roll Escape

Teaching #496
Artemis BJJ (MYGYM Bristol), Can Sönmez, Bristol, UK - 18/04/2016

For what's called the upa escape from the mount ('trap and roll' is another common term), a typical starting point would be when they try to establish their first grip on your collar (or your neck, if you aren't wearing a gi) for a choke. That provides you with a chance to trap their arm. The usual grip would be to grab their wrist with your opposite hand, then just above their elbow with your other hand. This is the preferred grip on Gracie Combatives. The reasoning is that this grip prevents your opponent from drawing back their arm for a punch.

There are various other possibilities, such as the option I first learned, which was gripping their wrist with your same side hand, then grabbing the crook of their elbow with your opposite hand. That has the advantage of helping you wedge your elbow and arm into their chest, which provides additional leverage when rolling them over. Having said that, you can still use your elbow with the Gracie Combatives grip, it's just slightly less effective as your arm starts further away from their torso.

Whatever grip you choose, you then need to trap their leg on that same side. Otherwise, they will be able to use their leg for base as you attempt to roll them. In order to prevent that, step your same side foot over their lower leg, hooking it in tightly to your bum. This means they are now like a chair with two of its legs missing. If you aren't too flexible and therefore can't easily bring your leg back, push it back with your other leg. For some extra control, slide your controlling foot horizontally across towards your bum, which should eat up some more space. If you aren't flexible, you could try pushing it in place with your other foot (a tip I learned from my student Jim the first time I taught this to him, as he's had part of his hamstring removed).

Even if they can't post with their leg, they might be able to use their knee, so you want to have their leg as tightly locked to your body as possible. Also, be careful that you don't end up hooking both their feet, or leave your other leg in range of their hook. It is possible for the person on top to defend this escape by securing a hook with their free leg, under your non-trapping leg. Therefore, try to keep the leg they might be able to control out of range.

A common problem is that you're having trouble trapping their foot, because it is too high up. If that happens, try using your elbow (or even your hand, if you need more reach, but that could leave your neck vulnerable) to shove their knee backwards, until their lower leg is in range. This is an advantage of the Gracie Combatives grip, as putting a hand behind their triceps puts your elbow in a good position for shoving back their knee.

Yet another option, if their arm is not in range, is to bridge enough to bump them forward, nudging them in the bum with your knee if you want more leverage. That should mean they are forced to post out their hands for balance, a difficult instinct to ignore. That puts their arm within reach. You can then wrap both of your arms around one of theirs, gable gripping your hands (palm to palm). Suck that arm into your chest, clamping it at the elbow.

To finish, you're going to bridge towards that trapped side. As with basic side control escapes, get your heels close to your bum first for maximum leverage. Bridge up and over your shoulder, turning to your knees: this puts you inside their guard. Make sure that you're bridging over your shoulder and not simply rolling over to your side. If you don't raise your hips properly, you may merely give up your back.

If you find you need more leverage, most commonly if they are posting with their free hand to stop your roll, you could attempt to dislodge that by pushing their arm off the ground. Alternatively, Rickson Gracie has a great detail, which he demonstrated in a video a while ago. Simply angle your head away from the shoulder you're rolling over: this increases your range of motion.


When you've successfully rolled them over, that puts you in the guard position. Remember to posture up immediately as you reach that position: if you are leaning forwards, they can control your posture, putting you at risk of a submission.
_____________________

Teaching Notes: There isn't much for me to do to this one, it feels pretty set now. A few people were pushing with their arm, so emphasising that you need to be careful about leaving your neck vulnerable is something I could emphasise more next time. Also, I think people could still drag their foot across more.

17 April 2016

17/04/2016 - Open Mat | Drilling yesterday's seminar

Class #713
Artemis BJJ (MYGYM Bristol), Can Sönmez, Bristol, UK - 17/04/2016

I still had an injured wrist on Sunday. However, I could run through stuff from yesterday's seminar with Jamie Hughes (which I'm still writing up: bit behind on my notes). I wasn't quite sure on the triangle set up where they still have their hand in, so I must be doing something wrong on that. Also, I need to drill the swivelling through armbar from turtle some more, check the pictures I took perhaps.

On a totally different topic, when showing the standard cross choke from guard, how best to teach the specific arm position? It can be tricky, I still haven't yet worked out the ideal way to explain it. I generally just tell people that they shouldn't flare out their elbows, but that isn't always successful in terms of getting the student to understand exactly what I mean. Naturally having somebody else to demonstrate on is best, but that isn't always an option. Something to keep thinking about.

Rich had an interesting variation on the straight anklelock, where he squishes the foot from a belly down position. I'm not certain if that's legal, although it might be a referee's discretion kind of thing. Rich's argument was that it's the same as a normal straight anklelock, he's just doing it in reverse.

16 April 2016

16/04/2016 - Jamie Hughes Seminar

Seminar #019
Pedro Bessa BJJ, Jamie Hughes, Bristol, UK - 16/04/2016


At today's seminar, brown belt Jamie Hughes went through a few closed guard sequences he's found useful in competition. The first starts a with strong cross collar grip. Pull them in with your legs, then angle out. When they start to rise, establish a palm down grip on their collar, Get your elbow under chin and complete the choke.

If they block your second grip on that choke, whip your legs up and lock around them: you're looking for a 'diamond' clamp, setting up a triangle. It doesn't matter if they still have their hand in, that will simply fill up any space for choking. Slide your leg into position for the triangle, then to finish, bring your arm around your knee, gable gripping. Squeeze for the tap.

If they block the arm but have their arm further through, you can switch to an armbar. Push them away with your collar grip hand, then bring your legs up into the armbar position. Pull back toes to tense and add pressure. Alternatively, reach under their leg, rolling them into a mounted armbar.

Next sequence begins from the scissor sweep. You have that collar grip again. This time, drive your collar grip side knee up into their chest, pressing in tight. Your other leg drops by their same side leg, chopping them over into mount. You can finish the choke from there, or switch to another attack. Keep your sleeve grip and choke grip, pulling the sleeve across as you swivel into s mount for the armbar. That sleeve pull will raise their shoulder, making the s mount switch easier. It also gives you the option of technical mount.

If you can't knock them over with the scissor sweep, change to a push sweep. If you can't get that either, bring your pressing knee out and over the top of their arm, shove the arm back with the knee, then circle round their head to move into a triangle.


Switching it up, you can make as if you're going for the scissor sweep, but instead kick your cross grip side leg out and clamp around their back. Punch across with your collar grip, pull their arm across with the sleeve grip. Squeeze your knees for a weird choke. If this doesn't choke them, it will probably give you the arm for an armbar (with this one, Hughes said it was ok to cross your feet). If they pull their arm free, you're in the perfect position to move into an omoplata instead.

Third sequence goes from the two-on-one grip break. Hughes recommends a different version to what I'm used to. Rather than bringing an arm underneath, he puts both hands on top, gripping firmly: this is more powerful, in his opinion. Yank it up and pull across, switching your outside arm to a pistol grip. You're slightly off to the side behind them, almost at their back. Stay tight. Grip their belt, lock your elbow in. Switch your grip from the sleeve to their trouser leg.

Kick your leg up towards their opposite shoulder, aiming to knock their shoulder into your chest. Upa and punch up with your trouser grip to roll through into mount. Loads of options now, from armbars to back takes, chokes, kimura grip, all sorts. Tricky to get the right weight distribution initially. Alternatively, grip break and punch across as before, then shrimp a bit to go to the back. Bring your arm across their neck, lock your other hand on their back for the 'short choke'. For more leverage, thrust with your hips.

A photo posted by Can (Jun) (@slideyfoot) on


If you can't knock them over, crawl up and around their back, swivelling the leg as you post out your arm, moving onto the back. From here, you can hook the far arm with yours, by the crook of their elbow. Bring your leg past the head, swivelling your body through. You can then lock in a 'reverse armbar', or grab their trouser leg and lift it through, to move into a standard armbar from mount instead.


15 April 2016

15/04/2016 - Teaching | Mount | Rolling Triangle

Teaching #495
Artemis BJJ (MYGYM Bristol), Can Sönmez, Bristol, UK - 15/04/2016

A photo posted by Artemis BJJ (@artemisbjj) on


The triangle is a versatile submission you can do from almost any position, even underneath side control. For the mounted version, you need to trap one of their arms while clearing the other, just like any triangle. To force that position, bring your knee up high on one side, then on the other, pin their arm to their chest. Grab their head, kicking your leg through on the arm-pin side, swinging it under their head.

You can then base out with the arm that was pinning, in order to lean heavily to that side. Switch the hand you had under their head to your shin, pulling that up. Try and lock your other leg around the shin, creating the triangle lock. You can then thrust your hips and pull up on their head to finish, or move into an armbar or potentially an americana against your leg.

If you don't have the leg length or flexibility to get your legs locked (a common problem), maintain your grip on your shin. Use that to keep control as you roll through, finishing the triangle from guard.

________________

Teaching & Sparring Notes: It's really hard to lock up the legs, so most people went for the rolling option. You need to lean a lot to get the necessary space to lock your legs. The other issue with this class is if people don't know how to do a triangle. I did some drills to introduce it, but if you've never seen a triangle before, then this is going to be hard. So perhaps this is something I should save for an 'advanced' class (which for me will just mean "requires prior knowledge") in future?

13 April 2016

13/04/2016 - Teaching | Mount | Cross Choke

Teaching #494
Artemis BJJ (MYGYM Bristol), Can Sönmez, Bristol, UK - 13/04/2016

Starting from high mount, keep low, your arm based out, putting your head on the same side to concentrate your weight. Remember to keep your feet tucked under their bum for control. Drive your first grip in, which normally is going to be blocked by their arms crossed over their chest. To work past that, Roger advises that you pull open their collar low on their lapel (or at least lower than their elbows. You don't want to get stuck trying to yank out the collar from directly underneath their tightly crossed arms). You can then slide your arm through. To make that extra-solid, Roger Gracie told me to brace your own elbow against your hip. You can then wriggle forwards, driving your arm in front of you with the combined power of your hips, legs and arm. Also form your hand into a wedge, as this will help cut past their blocking arms.

Either way, once you have the grip, lift them up towards you slightly, twisting your hand so that you create a small gap between their neck and collar. Into that gap, insert the thumb of your free hand, to establish your second grip. You can also drop your elbow to the other side, so that you're pressuring into their neck.

Slide that thumb behind their head to the other side of their neck. As you do, also move your head to the other side of their head. Next, bring the arm of your thumb grip to the other side of their head, 'shaving' close to their face. This is to set up the choke, putting your wrists on both sides of their neck.

Once you've got the thumb arm into position, so that both carotid arteries are blocked off, move your forehead to the floor directly above their head. Twist your wrists and drop your weight into them to finish the choke. Roy Dean provides a handy pointer here, which is to shift your hips forward slightly, still basing on your head. That will give you a little extra leverage, should you need it.

I focused on my preferred cross choke variation from Michel Verhoeven. After you've inserted your first hand, start to raise your partner towards you slightly. Bring your second arm around to the other side of their head, then 'shave' back across their face to position that arm by their neck. Grab a handful of gi by their shoulder, then drop your elbow so your forearm is over their throat. This second arm doesn't move after that point: the choke comes from twisting the first hand and drawing that first elbow back.
_____________________

Teaching Notes: I'm wondering if I should scrap the 'put the thumb in and loop around' part, just teaching the Verhoeven method instead. It would be quicker, though I should add in the 'shaving the face' element to get the arm tight to the neck. That's a little nasty, so I would like a gentler way of getting into the neck, like the thumb rotate for lifting the chin when on the back. I could also change my set up, as I'm beginning to move towards Saulo's conception of mount as a place to stay upright rather than low. So next time, I could modify the teaching on this a bit perhaps, try going from Saulo's upright posture instead?

Also, this class didn't just have an equal number of men and women, it actually had more women, so that's cool. That's only out of a small class (7 people), but I was still pleased. :D

13/04/2016 - Teaching | Women's Class | Americana from Mount

Teaching #493
Artemis BJJ (MYGYM Bristol), Can Sönmez, Bristol, UK - 13/04/2016

To begin the americana, grab their wrist with your opposite hand. Grasp their elbow with your other hand. Keeping both of your arms straight, lean diagonally forwards, using your weight to drive their arm to the ground (as per the picture, you can also follow Cindy Omatsu's example and use your head to add further leverage). The elbow of your wrist-gripping arm goes next to their head. Remove the grip you have on their elbow, then with your palm facing up, slip that hand underneath their elbow. As it slips under, turn your hand so the palm faces down.

With the hand you just slipped under, grab your other wrist. This means you now have a 'figure-four' on their arm, a solid grip. To complete the submission, keep your head down and lift their elbow, pushing their knuckles back in a straight line along the ground, like a paintbrush. You want to move their knuckles, rather than pulling their elbow down as well: that goes up (but only slightly), their knuckles go back. Also, keep the knuckles in contact with the mat.

You can also vary your angle, which will affect how far you have to push their knuckles. For example, Saulo Ribeiro teaches sucking the trapped arm in to their body, then lifting the elbow. His angle is such that he doesn't need to paint the hand back at all. It will also vary depending on the flexibility of your training partner's shoulder. Finally, you can try twisting your fists downwards, like you were revving a motorbike. That should further increase your leverage.

Finally, Rener has a helpful tip on securing your base when going for the americana. He likes to slip his opposite side leg underneath theirs, twisting his hips slightly in that direction. That's worth giving a try if you find it difficult to stabilise the position when you're trying to finish the submission.
_____________________

Teaching Notes: I think I remembered everything this time. I added in the high mount americana, plus as we had some time and there were only two people, I could take a request. That turned out to be a reverse triangle, handily, given I'd been learning that a few days earlier at RGA Bucks. Fun technique, even if it isn't all that high percentage. ;)

12 April 2016

12/04/2016 - Open Mat | Leglocks

Class #712
Artemis BJJ (MYGYM Bristol), Can Sönmez, Bristol, UK - 12/04/2016

The 50/50 guard break wasn't working for me, as Simon just rotated rather than his guard opening. Am I missing a bit? Perhaps grabbing the gi in a certain way or something? On the nasty calf leglock, that needs to be in the middle of their calf, plenty of meat. You can't get enough calf muscle if you go too low on the leg.

I also got to have a play with technical mount as Mike wanted to work on holding it. Underneath I was either pushing the leg or rotating under for deep half. On top, I kept going for the arm, always trying to attack. I think that might be part of why Mike was having some trouble maintaining it on top, it was a little static and I wasn't under threat, which gives me time to work my defence.

11 April 2016

11/04/2016 - Teaching | Mount | Take the Back

Teaching #492
Artemis BJJ (MYGYM Bristol), Can Sönmez, Bristol, UK - 11/04/2016

A photo posted by Artemis BJJ (@artemisbjj) on


Technical mount is useful for maintaining your mount, as per the drill we regularly do where you pull the elbow back up. It also enables you to take the back, with Galvao's method. Simply drop back from technical mount, rolling them over the knee you have near their head. The foot you had by their hip becomes your first hook, so you just need to bring the second hook over. Cut your knee underneath them to help facilitate that back position.

The same kind of motion works as a method of retaking the back if you lose one hook, so it has some versatility. In the context of retaking the back, the time to use this is before they get their shoulders to the mat. They've managed to clear one of your hooks and started bringing their hips over. Before they can get their shoulders to the mat, press your chest into their shoulder and roll them onto their side, in the direction they were escaping. You'll probably need to balance on your shoulder and head to get into the right position.

As they have cleared one of your legs, you should be able to then slide that knee behind their head (you might need to post on an arm, but see if you can do it without releasing your seatbelt grip). Sit back and roll them over your knee, then re-establish your second hook. You can keep doing that from side to side as a drill.

You can also take their back after moving to a really high mount. The first option from here tends to be an armbar, as getting their arms worked up high normally forces the arms to cross over the head/neck. If they have managed to position their arm in such a way that you can't get a good grip, swing your torso around so that your ribs are pressing against their forearm. That wedge means you can now walk sideways on your toes to roll them and take the back.

You could go all the way until they end up flat on their belly, for what is arguably the most dominant position in BJJ, full back mount. However, if you do that, I'd recommend getting an arm under their neck before you fully roll them over, as it can be irritating to dig your hand in once they are completely flat (after all, there is a reason judoka treat that paradoxically as a defensive position, used to stall for a few seconds in competition so they get stood back up).

My preference is to instead walk them just far enough to get them up on their side. From there, I can then move into technical mount. At that point you can then go for the back take from earlier, or you have the numerous attacking options, like chokes, armbars etc.
________________

Teaching & Sparring Notes: Next time I'll emphasise tightness, especially chest to shoulder, which slides around to middle of back. Generally ok though, it's a basic technique. Should I add anything? I wondered that last time, but felt like there was enough this time, so the small changes seem to have done the trick. Mainly that was talking about putting the hand in the collar and pulling up, building off the Saulo tip I watched on BJJ Library recently.

In sparring, I'm continuing to play with the aforementioned Saulo upright mount where you open up the collar, lots more attacking options. My balance feels ok, but is that just down to my experience advantage? Either way, I'm finding myself going for more stuff, opening them up more too as they defend. I'll be sticking with this rather than my usual low mount, as I don't find I'm just holding them in place with this. Of course, we'll see what happens when I try it on more experience people, I'm expecting I'll be getting rolled a lot more. ;)

11/04/2016 - Open Mat | Leglocks & Running Escape

Class #711
Artemis BJJ (MYGYM Bristol), Can Sönmez, Bristol, UK - 11/04/2016

I've been keen to get in some extra training for a while, as I'm not getting as much drilling and sparring as I'd like. Today was the first attempt to fit in some more, meeting up with a few people before class. We went through the leglock I learned from Kev on Saturday, which was useful. Drilling that indicated the importance of keeping your thumb up, to make sure you're driving the blade of your arm into the calf muscle. Also, you can bring your knee inwards, which keeps their leg twisted and I think makes it easier to attack that calf.

Ross and Milka were particularly good people to do this with, as they have that interest in the intricacies of technique, which really helps me get the most out of drilling. We also ran through leglock defence, the part that interests me more. I think I'll need to check back with Kev on the 50/50 guard break, I'm not sure I got all the details.

I also had a play with the running escape tip from a Carter Fisk video too, which is basically just shrimp firmly into them before you turn. That turn out from the running escape is much easier and less strain on neck than the leg swing, so if this makes the difference, I'd much rather focus on the turn. I'll keep playing with it.

There isn't quite enough room for sparring, as we're squeezing in around other people and classes. However, my hope is that if we can get a regular, committed group together, then I can go ahead and book a long-term slot.

10 April 2016

09-10/04/2016 - GrappleThon for One25 (London Edition)


Mike Cowling has been coming to the GrappleThons I run in Bristol for several years now. I first met him in 2013 when we were raising money for RapeCrisis (he's on the far left here), then again at last year's event for Equality Now (second from right on the bottom row). He was part of the dedicated twenty-hour crew this year too, but in 2016 went the extra mile by deciding to host a twenty-four hour GrappleThon himself a few weeks later, also supporting One25.

Thanks to Mike and his team, the total for One25 has had a considerable boost. Along with a big donation from BrisDoc among others, it means that at the time of writing the JustGiving total is over £5,000, which jumps up to over £6,000 when you add in gift aid. That's the second highest total we've ever managed: well done to all the fundraisers!

Mike added in lots of extras to his event at the London Wing Chun Academy, with food, massages and t-shirts. There were raffles and even a mini arcade, costing 20p to have a go on UFC 2. Incorporating that 'donate to play' model is a great idea, so I think I'll copy it for the next GrappleThon I do. Oscar mentioned bringing down a console, something we could perhaps put upstairs and turn into a sort of 'chill out' room. ;)

It's the second GrappleThon Mike has done at the school, having run a smaller event as part of ROLLforROWW late last year. That was squeezed into the side mats as he fit it around the school schedule. Mike also sent over pictures on the hour for the GrappleThon Instagram. I popped in briefly on my way through London, but didn't take part as I had a fresh tattoo healing on my arm.

This time around, I could stay much longer and actually take part. Mike kicked things off at 08:30am, sending over a few pics on Facebook like last time. I headed down to London in the afternoon (meeting up with an old friend I haven't seen in years, which was cool: we wandered round the National Gallery chatting), dropping off a banner and collection box afterwards at about 6pm. After a delicious meal of top notch Turkish food with my father at Babaji, I was finally ready to stay for the long haul from around 10pm through to the end at 08:30am on Sunday.


Mike's GrappleThons have already developed a tradition: at some point during the night, people put on masks. There was only one luchador at the ROLLforROWW edition, who was joined by two more this time around. The atmosphere reminded me of the first GrappleThon I ever ran, back in 2012. Most people were from the same team, though there were a few visitors from other BJJ clubs (like Hiren, another GrappleThon stalwart, plus people from Mill Hill and of course me). I look forward to seeing this grow, as Mike has said he wants to make it an annual event. Hooray for more GrappleThons! Especially as because I wasn't running it, I treated myself to a brief power nap at 3am or so. Refreshing. ;)

Class #710
Origin BJJ (London Wing Chun Academy), Open Mat, London, UK - 09-10/04/2016

I was keeping things chilled out as usual, but got in quite a bit more sparring than normal. Mostly that was relaxed flopping on top of people, or staying in open guard and fencing with my legs. I did have one slightly harder roll, mainly because I joined in the mask excitement and pulled on a fetching Deadpool number. It means you get hotter and sweatier, but the main drawback is reduced vision. At one point the eyeholes slipped away from me while my partner was going for a choke from the back. Fortunately he crossed his feet, so I could anklelock my way to safety. :)

A photo posted by @grapplethon on


I also played around with the material I'd learned earlier on Saturday at RGA Bucks, throwing up a few reverse triangles, as well as attempting that worm guard sweep Kev showed me. The main issue with that was tempting them to stand up enough that I could bring the lapel behind the leg. I think I need to swing out more to get the necessary space, but I'll keep playing with it.

I went for lots of armbars too. With the armbar grip break I learned from Matt H a while back, I wasn't getting low enough on the arm to generate leverage. That could mean my initial grip is too high, I'll need to practice it some more at open mat. I should get behind their arm better too, blocking them with my body. Saulo has a good video on that I want to rewatch.

09 April 2016

09/04/2016 - RGA Bucks | Side Control | Reverse Triangle

Class #709
RGA Aylesbury, (BJJ), Kev Capel, Aylesbury, Buckinghamshire, UK - 09/04/2016

A photo posted by Can (Jun) (@slideyfoot) on


After my private lesson, in the normal class Kev focused on side control. He started with some basic escapes, with the guard recovery. He has a little tweak I haven't seen before, in the last part where you're getting back into guard. Rather than wrapping the arm over the top and reaching for your other shoulder, he prefers to make a frame against their shoulder and bicep. That enables you to push yourself away, then move into either open guard or wriggle into closed guard.

Kev upped the complexity next, with reverse triangles. Having escaped, the leg that was previous by their hip now kicks up diagonally, past their opposite shoulder, straightening your leg. If you have long legs, it might be tricky to manoeuvre it in place, but I don't have that problem. Put that leg across the back of their neck, then the other leg comes up to lock over the shin, as with a normal triangle. You are essentially putting yourself underneath side control: the same technique will work if you're starting out from side control too, though the setup is a little different (you'd push their head down towards your leg).

It can be difficult to finish the triangle, but their near arm is vulnerable. You can attack with pressing armbars, kimuras and even americanas, due to locking that shoulder down so they can't relieve the pressure. If you're having trouble, straighten out your leg that's over their neck, to push their head down further. Turn your hips, then the leg that was across the back of their head becomes the leg that locks over the top. The legs are switching, changing the triangle configuration. The hard part is getting the lock in tightly enough by the shoulder, especially as you can't see what you're doing.

I was taking it easy in sparring, as I had the GrappleThon to go to later. I mainly tried more maintaining open guard, attempting to pull them into closed guard like Kev had taught me in the private.

09/04/2016 - Private with Kev | Open Guard | Leg Lock Defence, Calf Crush & Open Guard

Class #708 - Private #022
RGA Aylesbury, (BJJ), Kev Capel, Aylesbury, Buckinghamshire, UK - 09/04/2016

I know very little about leglocks. I don't really care about being able to attack with them, but I am keen to nail down the defence. Rolling with Seymour at the GrappleThon, I kept ending up in 50/50 without much idea of how to get out, while he went for my feet. The last proper look I had at leglock defence was when John Palmer went through a few options with me, way back during my awesome 2012 Texas trip. Leglocks aren't something that feature in the vast majority of my training, so rolling with Seymour was an eye-opener. I had been planning to work on leglock defence in this private anyway, but that confirmed why it was important. ;)

Fortunately, it wasn't as complex as you might think. There are three basic principles that run through most defences, which I knew already, so that's good. First, 'put on the boot': pull your toes back and straighten out the leg that's being attacked, as if you were struggling to get on a boot. Second, you need to pull them towards you (e.g., grab their gi or head), as they need to drop back to apply most footlocks. Finally, stand up, because they're going to have a really tough time getting anything once you get the sole of your foot on the ground and can bring gravity to bear.

That applies to both orthodox footlock set-ups and stuff like 50/50. Kev added in some more specifics for 50/50 defence, which starts off with the usual putting on the boot, grabbing the gi and standing up. After you've done that, 'hula hoop' to put their locking leg in front of you, then grasp their knee and the bottom of their trouser leg. You can then shove that leg down and begin your pass. If the 50/50 is too tight, Kev suggested grabbing the locking knee, stiff-arming then shifting your hips away. I think I must have missed some details though, so I'll double check that with him next time.

You can also get in some early defence, such as getting a spider guard push into the arm they want to use to underhook your leg. Grab their same side arm, push into the crook of the elbow and use that to free your elbow. Sometimes you might need to hook under their leg as you're escaping, such as when you push their foot down and pop your hips over (I don't remember all the details on that, so will need to drill it some more).

As much as I don't intend to attack with footlocks, it is useful to know a few. Kev shared a nasty calf crush with me, interestingly entirely legal for white belts under IBJJF rules (as ever, that is just one rule set, but it's relatively widespread these days). From your usual straight ankle lock position, drag the arm you have underneath across the middle of their calf, aiming to pull as much calf up on the side as you can. Maintaining the tension, bring your other arm under, pushing the calf even higher. Lock that hand (thumb up) against the calf, then bring your other arm around the first, like you were trying to rear naked choke their calf. Squeeze, while also turning your shoulders away from the leg (i.e., towards their other leg). This comes on quick, so do it with control.

We also ran through some open guard maintenance again, as that's still my weak point. Kev did some light sparring, after which he said my approach is ok, but added that I should be pulling them into closed guard (because I said that's where I want to end up, progressing from the shoulder clamp etc). To do that is simple, you just need to yank them towards you when you feel their weight coming forwards. You can also do it like a guard pull, with a foot on the hip, grip on the collar, then pulling and swivelling from the floor. I'm also not setting up my ankle pick sweeps as effectively as I could. Kev suggested coming in closer and hooking the leg, IIRC.

There was a funky worm guard sweep too. In closed guard (or open, but closed was how we started), pull out their lapel. Get that underneath your same side leg, for which you'll need to open your guard, but keep your foot on their hip. Feed the lapel to your other hand. They will probably stand up at this point. Continuing pulling the lapel, yanking it behind their leg and again feeding to your other hand.

You're now going to do a final hand switch, so that you're grabbing the lapel with your same side hand, palm down. Bring your free leg on the outside of their wrapped shin. To finish, do a technical stand-up. That should knock them over, whereupon you can move through to pass or possibly even mount (you'll need to let go of the lapel for that).

Finally, Kev also got back to me on something I mentioned a few years ago (I was impressed he remembered!) about the 'cat' and 'dog' position with the back when inside somebody's closed guard. When you pop out your back ('dog'), that enhances your posture. It also makes it tough for them to climb their legs higher up your back. When he demonstrated, it put me in mind of Jason Scully's 'eat the belt' guard break: I should use that posture more. Good reminder. :)

08 April 2016

08/04/2016 - Teaching | Mount | Technical Mount Choke

Teaching #491
Artemis BJJ (MYGYM Bristol), Can Sönmez, Bristol, UK - 08/04/2016

A photo posted by Artemis BJJ (@artemisbjj) on


For the standard technical mount choke, use your hand nearest their chest to scoop up their arms, also preventing them from digging an elbow under your leg. You need to get a hand under their top arm to grasp their nearest collar, then open it up. Your other hand curls around their neck, whereupon you can feed the collar for a tight grip.

Your first hand is now going to push through past the crook of their elbow, catching their arm in the process. Bring that hand behind their head, then pull your collar gripping hand back towards you, snaking around their neck. This should result in a tight choke: your first hand is mainly blocking their arm, rather than playing a major role in the choke. Simply keep driving that arm through as far as you can.

If they manage to block your choking hand, you can instead switch to an armbar. Your top arm will reach through and grab your own gi, while your other arm will post directly in front of their face. This help prevent them escaping the attack: if you want to be mean, you can also dig the elbow of your first arm into their side. Lean towards their feet, step your leg around their head, then drop back for the armbar, squeezing your knees as usual.

_______

Teaching Notes: There is a Saulo choke version of this, where you grip differently, but I'll save that for later: it's harder to land, as you have to get the pressure right. Main thing I want to emphasise on this next time is what your pushing arm does. You keep extending it past their head, sliding behind. A few people seemed to get confused with the motion, so I'll spend a bit more time demonstrating that next time. All in all worked ok though, as it isn't a difficult choke. :)

I didn't go into detail on the armbar, but I'll leave that in the notes for next time. I did mention it, as that's a good follow up which is right then when you're going for the choke.

06 April 2016

06/04/2016 - Teaching | Mount | Armbar

Teaching #490
Artemis BJJ (MYGYM Bristol), Can Sönmez, Bristol, UK - 06/04/2016

You've managed to move into high mount and get underneath their elbows. Reach your arm under their opposite forearm, past the crook of their elbow. Grab around their arm, so that you're gripping the tricep. You're then going to move into s-mount, in a motion that has some similarities to the technical mount switch. Pull the arm you've gripped across, creating space to slide your knee forwards. If you need additional base, post your free hand by their head as your knee comes up, swivelling your torso to face their other arm.

Your other knee does not raise off the ground. Instead, you're sliding it along the ground, then twisting and curling it around your opponent's armpit. If you do raise that knee, you're at risk of leaving enough space for them to escape. Keep the knee low. Leaning forwards once in position may help too, to maintain your balance.

Lock the arm to your chest, or secure it by grasping your own collar. Scooping up their other arm can be useful here as well, if you can, also giving you the option of switching sides if you need to. Some people will grip their curling-leg ankle from here, reaching under their opponent's head (which has the additional advantage of cross-facing them). This will depend on your leg length and flexibility: you'll want to be comfortable with the position first, which is an awkward configuration.

Keep your legs squeezing into them, then lean sideways towards their stomach. This is to lighten your knee-leg, so you can bring that over their head. Lean forwards, sliding down the arm you trapped at the start, staying close to their shoulder. From here you'll be looking to drop back for the armbar. However, that moment where you're bringing the leg over their head is also where you're at risk of giving them too much space (which is why Saulo recommends leaning forwards).

To prevent them turning into you, continue to lean into them, backstopping their elbow with your body. They need their elbow to turn, so don't let them have it. Grabbing their leg will make that even tougher for them, though note you'll normally need to switch arms for that. They will also try to bring their head into play, aiming to get to their knees so they can start stacking you. Use your leg to push their head away, so they don't have the posture to recover a strong position.

Finally, you will most likely find that they clasp their hands together in some way. There are numerous options for breaking the grip. The simplest and most universal is, I think, bringing your leg into the crook of their elbow and pushing the grip loose, combining that push with a pull from your arms. It isn't foolproof, but it seems to be the one that works most often for me. Drop back, squeezing your knees, then pull down on their wrist and raise your hips for the finish.
_______

Teaching & Sparring Notes: This was feeling fairly good today, which I'm pleased with as it's still only the third time I've taught this lesson. People are continuing to raise their knee with the curling leg, but I made sure to emphasise that repeatedly, so I think it's getting less. Treating it as a slide and curl seems to help, as I'd hoped. I'll emphasise the lean even more next time. I've found it best to lean towards their legs and a bit forward (to make it harder for them to pull their arm free). However, quite a few people were trying to fling their leg over after they'd already slid down the arm, which also left their hips quite far from the shoulder. At the moment I'm switching arms so I can grab a leg, but I could also show the figure four grip instead for control. I might give that a go next time. Also, should I include the more complicated armbar grip break? I go with a simple kick into the elbow crook normally, but it would be good to show this one at some point too:

A photo posted by Artemis BJJ (@artemisbjj) on


Sparring was fun today, especially as it was odd numbers so I got to play too. In specific sparring, I tried an approach Saulo recommends on BJJ Library. Previously, I've always stayed low, with a similar posture and control to when I'm using low mount. Saulo's option is to remain upright, opening up their collar and using that to slide your arm down to the neck, thumb on top (which sets you up for several chokes, especially the Saulo choke and the palm up palm down choke). I wasn't generally getting close to choking, but it did make it easier to switch into either an armbar or technical mount. I'll have to try that against more experienced partners though, as I suspect I don't quite have the balance, or the defence against random legs flying in. I felt I had a lot more opportunity to attack, though.

I went for armbars a number of times, with an interesting progressive resistance experience going with Kirsty (W, not H). As I'm the instructor, she immediately went into heavy resistance. The main problem I had there was getting tight enough on the arm before she could pull it free. Another time, I had the arm, but she was able to get her legs into play to disrupt the attack. Come to think of it I should have asked more questions: either way, this confirms that when I have an opportunity to jump into progressive resistance, I should take it. In fact, I could even split people into groups, to make sure I get a go at progressive resistance? That could be a plan, as I've been wanting to get in more training and this would mean I get to drill too. However, I wouldn't want to cut down people's training time. I'll have a think: might be worth a go next lesson, as it has the plus side that you'd be doing progressive resistance against different body types too. I used to do groups of three back at PHNX, with one person in and the other two switching in. That could work.

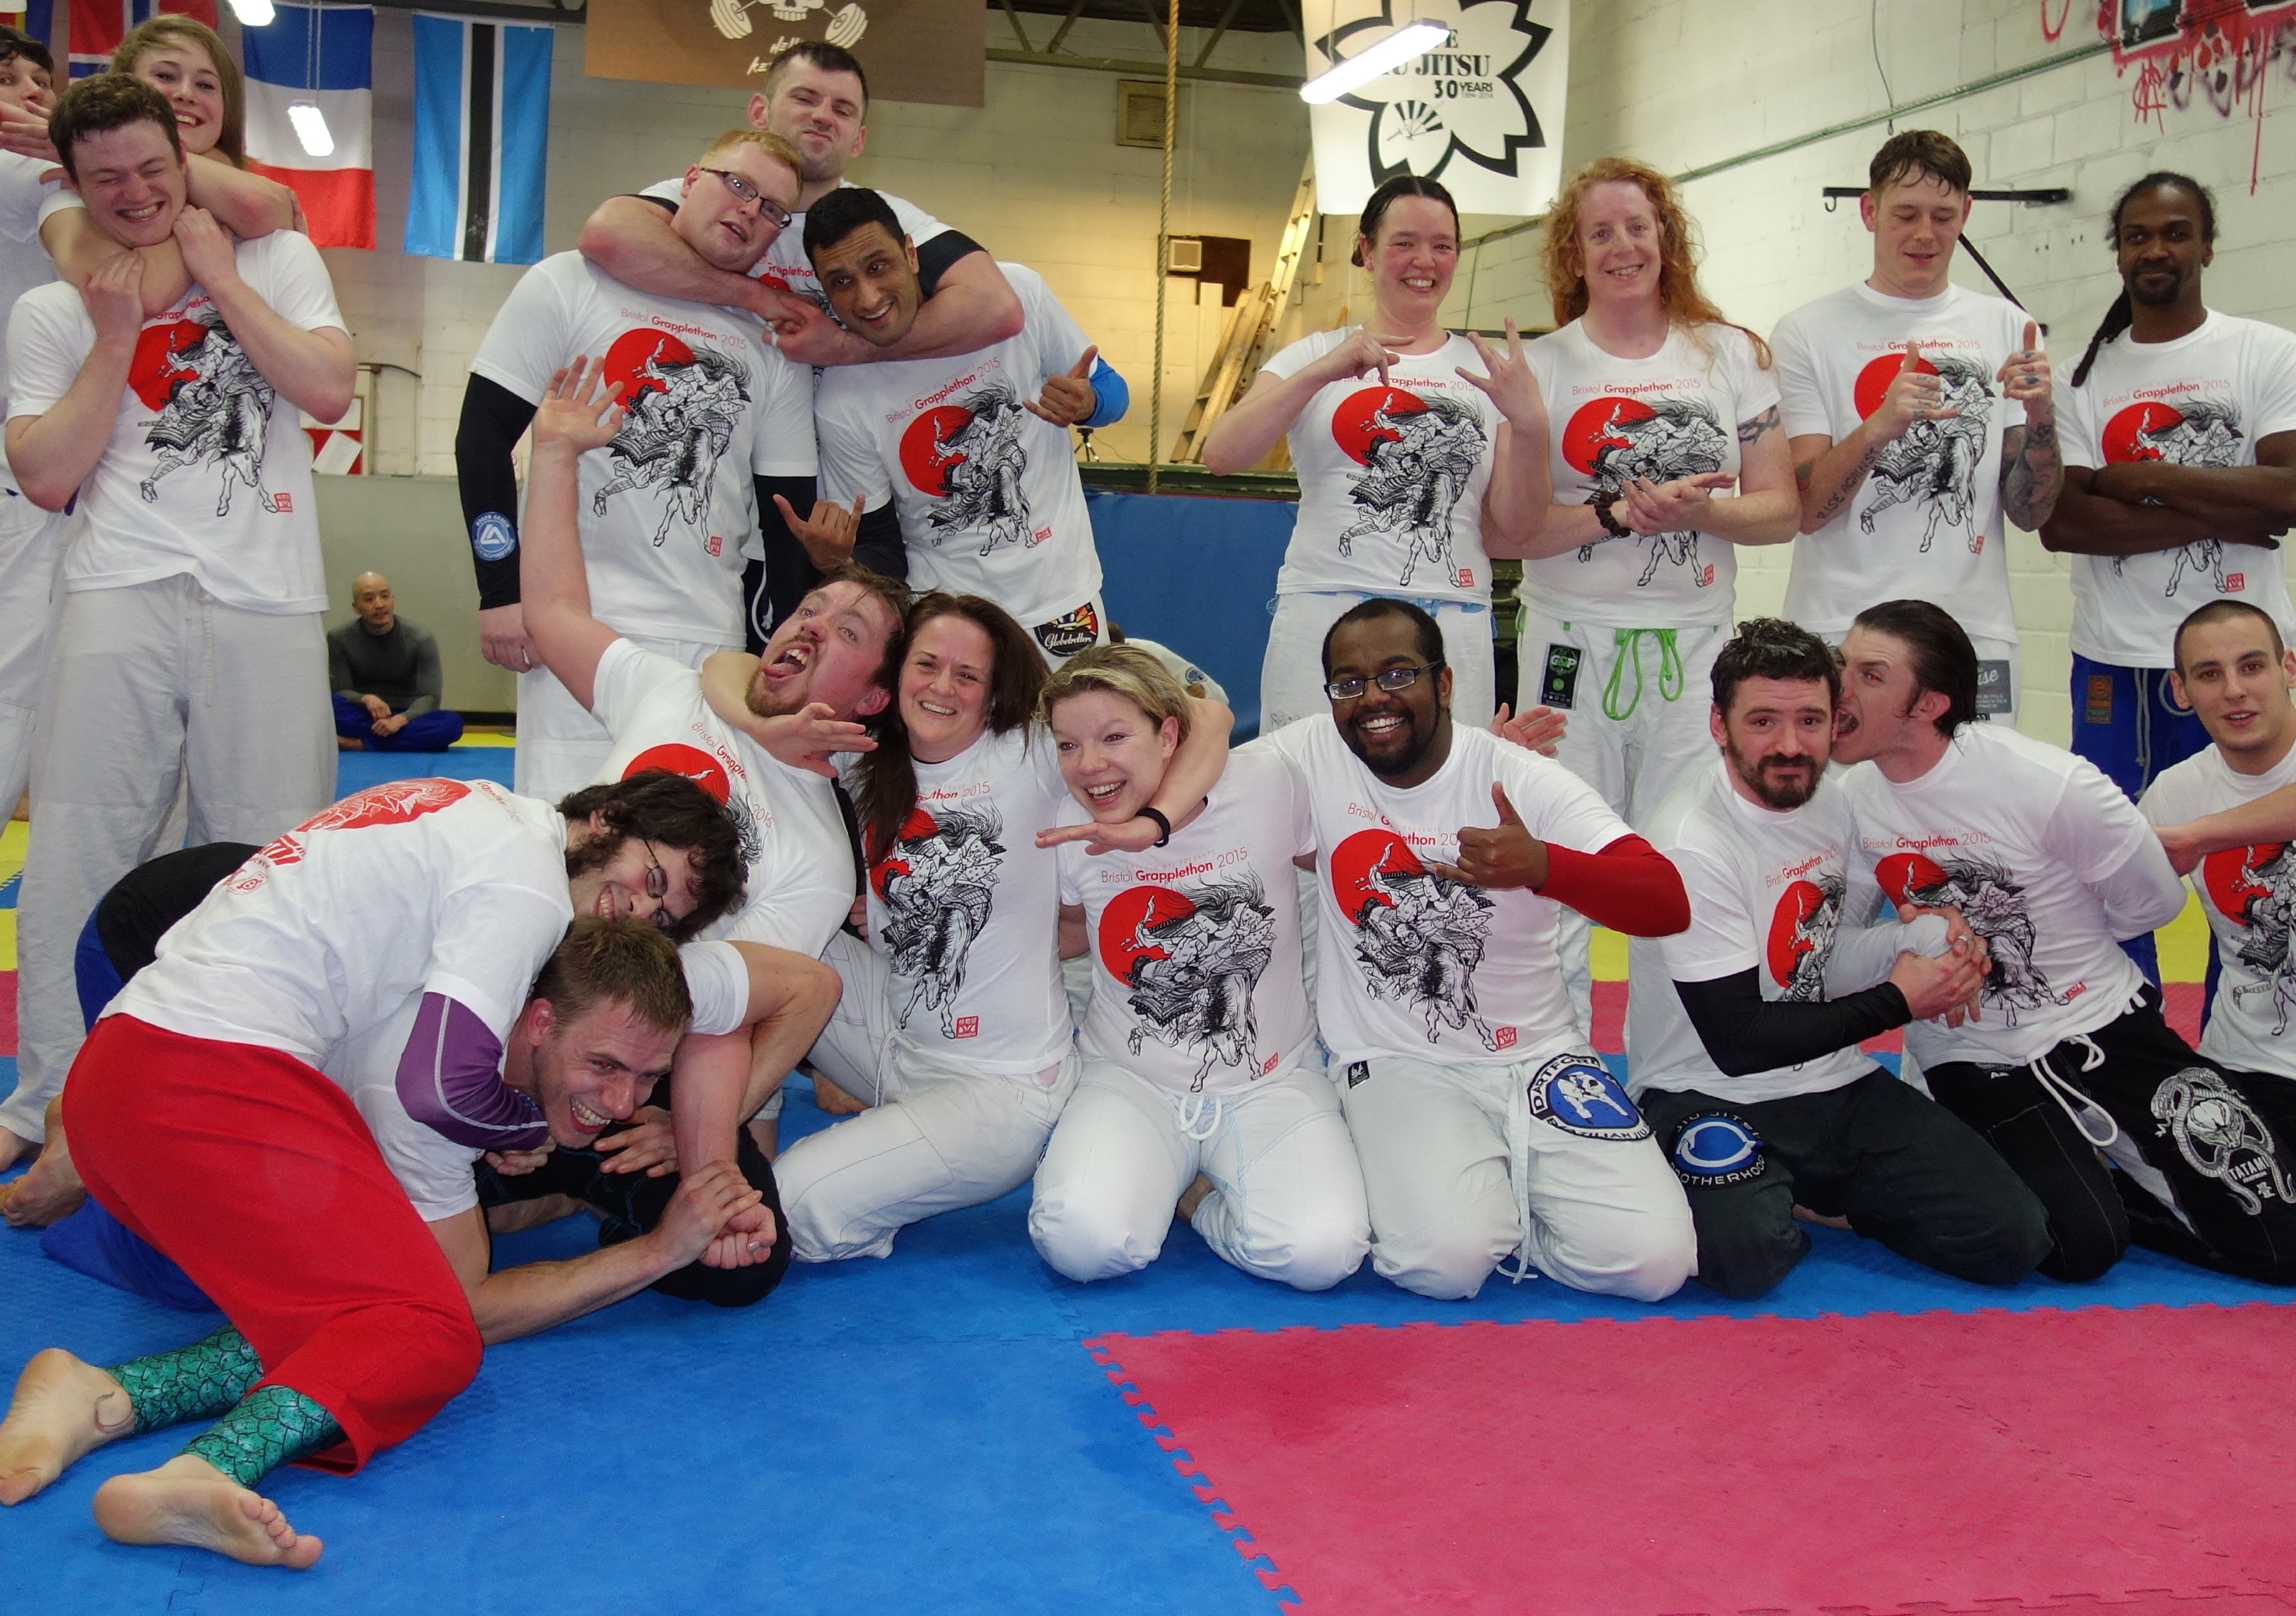
In free sparring, I need to be careful of my neck. I was holding on to a kimura grip as I often too, which ended up with me swivelling underneath and getting a bit squished. I realised part way through and adjusted, which is good, but I don't want to be putting myself in those positions. I'd rather get passed than screw up my neck. I've messed it up so many times in the past, albeit only minor tweaks, but that means I'll have a sore neck for several weeks and affects my sparring. Also, I must remember to sit up when the opportunity arises in open guard, even if I'm still a bit underneath them. It will be good to get in loads of sparring at the GrappleThon this weekend (08:30-08:30 from the 9th April to the 10th, down at the London Wing Chun Academy near Wood Green), assuming my body holds out. Especially as I'll be training at the RGA Bucks open mat earlier that day, which is often quite hard on my weedy, low cardio body. ;)

Final thing I should mention is the Ana Yagues seminar we're hosting at Artemis BJJ on the 24th July. I'll keep mentioning it, but on the off chance I have any readers who don't also follow the Artemis BJJ Facebook page, everybody is welcome and it's only £20. Check the Facebook page for details. :D

06/04/2016 - Teaching | Women's Class | Trap & Roll Escape

Teaching #489
Artemis BJJ (MYGYM Bristol), Can Sönmez, Bristol, UK - 06/04/2016

For what's called the upa escape from the mount ('trap and roll' is another common term), a typical starting point would be when they try to establish their first grip on your collar (or your neck, if you aren't wearing a gi) for a choke. That provides you with a chance to trap their arm. The usual grip would be to grab their wrist with your opposite hand, then just above their elbow with your other hand. This is the preferred grip on Gracie Combatives. The reasoning is that this grip prevents your opponent from drawing back their arm for a punch.

There are various other possibilities, such as the option I first learned, which was gripping their wrist with your same side hand, then grabbing the crook of their elbow with your opposite hand. That has the advantage of helping you wedge your elbow and arm into their chest, which provides additional leverage when rolling them over. Having said that, you can still use your elbow with the Gracie Combatives grip, it's just slightly less effective as your arm starts further away from their torso.

Whatever grip you choose, you then need to trap their leg on that same side. Otherwise, they will be able to use their leg for base as you attempt to roll them. In order to prevent that, step your same side foot over their lower leg, hooking it in tightly to your bum. This means they are now like a chair with two of its legs missing. If you aren't too flexible and therefore can't easily bring your leg back, push it back with your other leg. For some extra control, slide your controlling foot horizontally across towards your bum, which should eat up some more space. If you aren't flexible, you could try pushing it in place with your other foot (a tip I learned from my student Jim the first time I taught this to him, as he's had part of his hamstring removed).

Even if they can't post with their leg, they might be able to use their knee, so you want to have their leg as tightly locked to your body as possible. Also, be careful that you don't end up hooking both their feet, or leave your other leg in range of their hook. It is possible for the person on top to defend this escape by securing a hook with their free leg, under your non-trapping leg. Therefore, try to keep the leg they might be able to control out of range.

A common problem is that you're having trouble trapping their foot, because it is too high up. If that happens, try using your elbow (or even your hand, if you need more reach, but that could leave your neck vulnerable) to shove their knee backwards, until their lower leg is in range. This is an advantage of the Gracie Combatives grip, as putting a hand behind their triceps puts your elbow in a good position for shoving back their knee.

Yet another option, if their arm is not in range, is to bridge enough to bump them forward, nudging them in the bum with your knee if you want more leverage. That should mean they are forced to post out their hands for balance, a difficult instinct to ignore. That puts their arm within reach. You can then wrap both of your arms around one of theirs, gable gripping your hands (palm to palm). Suck that arm into your chest, clamping it at the elbow.

To finish, you're going to bridge towards that trapped side. As with basic side control escapes, get your heels close to your bum first for maximum leverage. Bridge up and over your shoulder, turning to your knees: this puts you inside their guard. Make sure that you're bridging over your shoulder and not simply rolling over to your side. If you don't raise your hips properly, you may merely give up your back.

If you find you need more leverage, most commonly if they are posting with their free hand to stop your roll, you could attempt to dislodge that by pushing their arm off the ground. Alternatively, Rickson Gracie has a great detail, which he demonstrated in a video a while ago. Simply angle your head away from the shoulder you're rolling over: this increases your range of motion.


When you've successfully rolled them over, that puts you in the guard position. Remember to posture up immediately as you reach that position: if you are leaning forwards, they can control your posture, putting you at risk of a submission.
_____________________

Teaching Notes: Although this isn't the highest percentage escape, I do think it's a good one to teach first. Handily, there was a brand new student today to test that hypothesis: hopefully she'll be back. Things to emphasise are dragging the foot horizontally across to trap the foot, along with noting that you will normally combine escapes so don't get too obsessed with just one. As there was a new person, I spent longer on drilling and demo than normal: when it's all people who have been through the cycle before, I tend to throw in an extra technique. I like the flexibility of the women's class, it's a good atmosphere. Nevertheless, I am still very keen to have a woman teaching the class, as with me instructing it isn't truly women-only. Hopefully there will be a few people ready and able to do that in maybe a year, but we'll see how it progresses. :)

05 April 2016

05/04/2016 - Open Mat

Class #707
Artemis BJJ (MYGYM Bristol), Open Mat, Bristol, UK - 05/04/2016

Just one beginner showing up today, so I spent today's open mat running through the basics of mount with him. For me, that's maintaining low and high mount, along with the trap and roll escape plus a heel drag. I could also throw the elbow escape in there, but the heel drag is more effective.

For introducing mount to an absolute beginner, I like to run through lots of bridging drills too, which I split into three. You have the straight up and down bridge, which is mainly useful for dislodging submission attempts and getting people to post their arms on the ground. Then there's the angled bridge, mostly used under side control. Finally, you've got the bridging turn to knees, essentially a trap and roll without a person on top.

04 April 2016

04/04/2016 - Teaching | Mount | Maintaining High Mount

Teaching #488
Artemis BJJ (MYGYM Bristol), Can Sönmez, Bristol, UK - 04/04/2016

The drawback to the low mount is that there aren't many submissions from there: the ezequiel is one of the few high percentage attacks. In terms of their defence, they are mostly going to be trying to unhook your feet and digging their elbows under your knees, so you'll be battling to keep those in place.

To attack, you're better off climbing further up, into high mount. Again, you need to worry about their hips. To control them, put your feet by their bum, tucking your toes underneath: Roger Gracie points this out as of particular importance. In what you might call 'middle' mount where you're still over their hips, Saulo suggests that you 'ride' their bridges, like you were on a horse. Lean back, then as they bridge, lift up: you’re aiming to move with their hips, rather than just leaving a big space. So, this takes a good understanding of timing.

He also recommends against leaning forward, as he feels that gives them more space and leverage to escape. Hence why he leans back instead. Experiment, seeing how holding the head works for you versus leaning back. I think Saulo’s method requires more experience, and personally I feel unstable there, but as ever, I want to offer students choice whenever possible.

The danger of leaning back is when you're facing somebody with flexibility and/or long limbs. They might be able reach their legs over to kick into your armpits, either sliding out through your legs or pushing your over. You must control their hips with your feet, to prevent them from bending their body. Swimming the arms through might help you out here, this time against their legs, depending on how they attack. If they do get their feet in place, I generally grab on the back of their collar, stay really low, then attempt to gradually work my hips back to flatten them out: that worked for me last time it happened.

Another option is to move off their hips, shifting into an even higher mount. Gradually walk your knees into their armpits (pulling on the top of their head may help, which will also stop them wriggling back out) being careful of the elbows. If they start to work an elbow into your thigh, twist to one side and raise that knee. Pull their arm up with whatever you can grab, then reinsert your knee. I've seen Rob S teach grabbing their sleeve with your opposite hand, while Mauricio likes to grab the elbow with their opposite hand and Felipe essentially shifts to technical mount for a moment.

The difficulty in reaching high mount tends to be getting past their elbows. The ezequiel choke is one way to get them to lift their elbow: as soon as they give you that space, shove your knee into the gap. To really fire the leg forward, you can push off your toes. Another option is to simply keep walking your feet up their sides, as if you were climbing up a wall. Every time you see a gap, fill it, until eventually you're up really high and their bridge is nullified. Finally, another nifty option is to push on their shoulders with your hands, stiff-arming. Putting your weight into their shoulders makes it hard for them to prevent their elbows rising, where again you can slip those knees in.

You will probably also want to anchor yourself in place somehow. Grabbing the top of the head is the simplest option. Alternatively, you can put your elbows on the mat, directly above their shoulders. It's important that when you get that space, don't let them have it back. Hooking under an arm and walking your fingers up can help make that space too. Finally, on a somewhat different topic, keep in mind that cross facing to stop them turning works from mount, just as it does from side control.
_____________________

Teaching & Sparring Notes: Having added the ezequiel to the low mount class, I think although it does work ok in that, it would be good to show it in the high mount class too. It fits well as an option for going into high mount, particularly given the class still feels rather sparse. Having said that, I didn't go into detail on switching to technical mount, which would be another good option to add in. I could show switching to technical mount as they turn, as well as the back take from there. Or just keep including it in the warm-up?

In sparring, I was keen to practice driving a hand in, then working for a choke. Like last time we did mount month, I was looking for the Saulo choke. I encountered an interesting problem with that today, which was that my sparring partner's gi has slipped down his shoulders, so there was nothing to grab. Probably a good reminder to get back to working on the armbar. I've yet to work out a high percentage way to attack the mount. I can hold it against the average student (although my class is almost all white belts, so it's not been tested that much), but often struggle to then progress to something.

There was a point last yet where I was starting to feel confident with the mount choke, but that seems to have dropped off again. All about combinations, so I think the way to go would be armbar into a choke, along with technical mount options. I'll keep playing with that over this month. :)

03 April 2016

03/04/2016 - Open Mat

Class #706
Artemis BJJ (MYGYM Bristol), Open Mat, Bristol, UK - 03/04/2016

I got in a few rolls with Paul, one of the more experienced blue belts at the club, which was cool. Again, I wanted to work on my open guard, trying to solidify my defence. I think I need to think more about my frames, as I tend to find I can get squished onto my neck sometimes underneath, twisting into positions I probably shouldn't. If I can get my legs in the way, generate a better frame, that will help. Like I was saying last time, single leg x and x guard would be worth a look. If I can combine that with what I already use (sitting guard and the tripod/sickle sweep, mainly, plus a bit of butterfly), I should be good to go.

I also need to be careful of picking up little knocks. I'm very lazy and risk averse, so anything getting knocked means I will tend to either sit out of sparring or just go very light. Today, that was jarring my elbow as I posted too hard on my arm in the middle of getting swept. The GrappleThon in London will be a good test of that, as I also need to make sure I don't try and get too physical, because my weedy little body isn't up to it, especially as I'm getting ever closer to 40. ;)

01 April 2016

01/04/2016 - Teaching | Mount | Maintaining Low Mount

Teaching #487
Artemis BJJ (MYGYM Bristol), Can Sönmez, Bristol, UK - 01/04/2016

There are two basic types of mount to choose from, which I call low and high. Once you've achieved mount, I find that low mount provides the most control. First off, you want to immobilise their hips, as their main method of making space is to bridge up forcefully.

Bring your feet right back, threading them around their legs to establish two hooks: this is known as a grapevine. Alternatively, you can also cross your feet underneath (or just near, depending on your flexibility and leg length) their bum, which has the advantage of making it much harder for them to push your hooks off. Your knees are ideally off the ground, to generate maximum pressure. How far off the ground they are depends on your dimensions: the key is getting loads of hip pressure. Another option, which I learned from Rob Stevens at Gracie Barra Birmingham, is to put the soles of your feet together and then bring your knees right off the floor.

Whichever option you're going for, thrust those hips into them. It's important to get into a position where you can thrust your hips down, rather than getting bunched up so your bum starts going into the air. Use your hands for base, where again you have a couple of options. Either have both arms out, or put one under the head (remember, you can always remove it for base if you're really getting thrown hard to that side) while the other goes out wide for base.

Try to grip the gi material by their opposite shoulder, or even better, by the opposite armpit. Keep your head on the basing arm side, loading up your weight there. If they're bridging hard, you can switch from side to side, lifting their head slightly and bringing your other arm under, meaning your remaining arm bases out to the other side.

To do the trap and roll/upa escape, they will need to get control of your arm. So, don't let them grab it and crush your arm to their side. Instead, swim your arm through, like Ryron and Rener demonstrate in the third slice of the third lesson in Gracie Combatives. Be sure to do it one at a time, or you may get both arms squashed to your sides.
_____________________

Teaching & Sparring Notes: Adding in the ezequiel seemed to work ok, I'll try it again next time I teach this. It would work in the high mount lesson, but then as it's the central attack from low mount, I think it fits better here. I'll also need to pay special attention to whether or not anybody gets confused next time I do this lesson, to make sure it isn't an overwhelming amount of detail.

I got in some more sparring, which is important. I'm still heavily focused on open guard, my weakest area. I'm continuing to test out sitting guard, giving that lower base a try with the elbow down rather than hand. I want to be able to hinder their leg bending and turning, so need to make better use of my own legs, I think. It could be worth giving stuff like single x a try, which I haven't looked into much yet.

I also need to grab their arm if they try to get hold of my head in koala guard. I can then treat it as a similar sweeping platform to de la Riva when you have that arm, with the considerable bonus of not using de la Riva (I've never been keen on that guard, due to the knee torsion and my short legs). The main thing I need is super-specific sparring with the more experienced grapplers here, like Sam. I want to isolate exactly where my open guard defence breaks down.

Also, it was a 100% international class tonight, with people from Norway, Bulgaria, Poland, New Zealand, Australia and me (in my case, take your pick from Turkey, Germany, Belgium and a few others). Which is cool: hooray for immigration and the EU, I guess. ;D