slideyfoot.com | bjj resources

 Home
 Contact
 Reviews
 BJJ FAQ  Academy

This website is about Brazilian jiu jitsu (BJJ). I'm a black belt who started in 2006, teaching and training at Artemis BJJ in Bristol, UK. All content ©Can Sönmez
Showing posts with label 1.25hr class (teaching). Show all posts

21 November 2018

21/11/2018 - Teaching | Side Control | Keylock series

Teaching #816
Artemis BJJ (MYGYM Bristol), Can Sönmez, Bristol, UK - 21/11/2018

In a progression from the americana, I moved on to what I call the Roy Dean lockflow, as he is the person who taught it to me during one of his seminars (it's also on his DVD, Purple Belt Requirements). If they start to slip their arm free from the americana, you don't want to simply go for the same thing again. It is of the utmost important that you combine techniques in BJJ, instead of viewing them in isolation. That goes for escapes as well as attacks. What I wanted to show was an example of that, using the americana as a starting point.


You also want to avoid meeting force with force if possible. So instead, as they slip out, go with it, letting them straighten it out. However, this sets you up for another attack, as you can get a pressing armbar from here. Slide your figure-four grip up their arm, so that you have one hand around their wrist, with one of your arms a little in front of their elbow. That means you've created a fulcrum, so you can press their wrist down to apply a jointlock.

Roy Harris, Dean's instructor, has a whole DVD on bent armlocks. For the transition to the straight/pressing armbar, he advises moving your weight forward, so your chest is over their elbow. Harris also puts his arm in the crook of his elbow, raising his other elbow off the ground to get the pressure. You may need to twist their wrist to get their thumb pointing up, in order to create the right leverage on their elbow.


Possibly they manage to slip out of that as well, meaning their arm begins to bend in the other direction. Don't worry, you can still keep attacking. Clamp their arm to your chin using your own arm, then switch your free arm underneath. Get your wrist by your head, ready to push their wrist to the mat. You can now apply the kimura, similar to the americana, but with their arm pointing in the opposite direction. If you need extra leverage, turn to your side and base out.

For even more leverage, step over their head and lift them slightly off the floor. Keep in mind that if they slip free of that, you can go back to the pressing armbar and americana: hence why this is a lockflow, because it should be continuously available as long as you maintain control of the far arm. There is also the option of pulling them up on their side and switching into a kimura from north south, depending on how solidly you have that arm controlled.
_____________________

Teaching Note: Last time I just showed the straight armbar, I thought I'd try going through the kimura too. I'm still not sure they go too well together in a lesson, but good to give it a go. Also means I've got video of it now, just need to wait until I've uploaded the relevant video before I can update this post with footage. ;)

28 May 2015

28/05/2015 - Teaching Notes

Teaching #329
Artemis BJJ (PHNX Fitness), Can Sönmez, Bristol, UK - 28/05/2015

Last Thursday class tonight, before I move everything over to MYGYM Bristol. Although the PHNX facility is pretty good with a decent mat space, numbers have stayed low. As the much larger membership over at MYGYM have been asking for more classes, especially open mat time, it makes sense to consolidate there. That should also provide more scope for competition prep, as a few of the MYGYM crew have showed interest in competing. It would be cool to have a team of people there, hopefully with enough that we can get video of all the matches to analyse later. :)

Tonight I continued with the breadcutter choke, this time adding in some follow-up attacks. The far side armbar isn't one I've ever used myself, because it's a quick motion and if you mess it up, leaves lots of room. The idea is you scoop up the far arm, press your head into their stomach to provide some weight, then pop up into a crouch. Cut your knee around their arm, swivelling into position for the armbar.

The near side armbar potentially leaves space too, but feels a bit tighter. This time, you're doing it off that initial collar grip from the breadcutter choke. Pinch your elbow in tight and drive your knee nearest their legs into them, folding your leg behind their back like you would in technical mount. Bring your knee up and tight against their arm, swinging your other leg over their head. You can then lean back to finish, and/or lean towards their head to get your leg extended over them. That makes it tougher for them to escape, as opposed to the 'Japanese armbar' that gives them a chance to potentially turn.

I also threw in the north-south kimura, as that's the one I tend to go for. I'm not sure if it is the easiest one to get, but it feels that way to me, as well as being the most secure. However, that could just be because I use it quite often in sparring, so it might just be familiar rather than genuinely higher percentage than the armbars.

14 May 2015

14/05/2015 - Teaching Notes

Teaching #323
Artemis BJJ (PHNX Fitness), Can Sönmez, Bristol, UK - 14/05/2015

Re-run of the recovery to guard again today, especially as unusually for the Kingswood location, we had a bunch of new people. I therefore decided it was best to keep things good and basic. Having said that, one of them was an experienced judoka who has clearly done some cross-training with BJJ too. Despite being a big, beefy guy, he also had good control. Hopefully he'll pop down again sometime, as that's the kind of person who is an asset to any class. :)

I remembered to use the John Will method midway through the class. I haven't asked the guy who requested I do that how it's been going yet, so I'll make a point of doing it next week. That will mean a bit more time to test it out too: he's one of the most regular students, so should be able to let me know if it's been helpful next week. I just need to decided if I'm going to continue with my usual side control maintaining on top, or try something I do less often, like scarf hold, north south or even knee on belly (a position I rarely use myself). There's the option of various side control gi chokes too, which would be useful for me as well. Best to do those on Monday when I can be sure everyone will have a gi, though having said that it's pretty much just one person who regularly turns up on Wednesdays without a gi.

30 April 2015

30/04/2015 - Teaching | Mount | Heel Drag

Teaching #319
Artemis BJJ (PHNX Fitness), Can Sönmez, Bristol, UK - 30/04/2015

The elbow escape is related to my personal favourite mount escape, the heel drag. The heel drag is also quite simple, which is another reason I like it so much. You're in mount, your elbows in a good place for defence, down by their knees. For this escape to work, you need to have one of your legs out flat, just like before. Again, you also need to get on your side: a slight bridging motion will help.

The big danger at this point is that the person on top will switch to technical mount. You therefore need to make sure that your neck is safe if that happens. You also don't want to let them settle into technical mount: immediately prepare your frames to start escaping before they secure the position. You may even be able to disrupt them as they try to shift, using that shift in their base to enter into your escape.

If they don't get to technical mount, or you're able to work back to the previous position, wedge an elbow underneath their knee. You can either make a frame against their hips, or if you're concerned about your neck, adjust so that you can still pry your elbow under their knee while protecting your collar with your hands. As well as chokes, you also need to be wary of their cross-face: if they can control your head, they can flatten you back out, which will make the escape less effective. Use a combination of your elbow and shrimping to shove their knee backwards, on your flat leg side.

Bring your other foot over both your flat leg and the leg they have next to it. That means you can use the heel of that foot to drag their leg over your flat leg. As soon as you get it over, lock half guard and shrimp towards their trapped leg. In half guard, you want to get onto your side as quickly as possible: if you stay flat on your back, you've already done their work for them, as they will want to flatten you out in order to pass half guard. If you're comfortable in half guard, you could stay there and work your attacks.

Alternatively, keep shrimping in the other direction, in order to free your other leg, just like you would with an elbow escape. It's also worth noting that some people, like Roy Dean, recommend just pinching your knees rather than fully triangling your legs around theirs, so that's worth trying too. To help recover full guard, you can also bring your arm across to their opposite shoulder, impeding their movement while aiding yours. Emily Kwok has a handy tip too: if their foot is too flat, making it hard to get your heel in for a drag, shove under their heel with your knee to pry it up and create that space between their foot and the mat.

A very similar escape, which I don't use much, is the foot lift. Dean shows these two escapes in sequence on his awesome Blue Belt Requirements. The foot lift is for when they have some space underneath their in-step. People won't often do that, in my experience, but if they do, this time just step over your flat leg. Use your foot to hook underneath their instep and lift it over, then as before lock up half guard (your legs are already in position), or shrimp to recover full guard.

Make sure that you pay particular attention to shoving on their knee with this variation, as it is easier for them to slip free (though if that happens, you can always switch to the heel drag). With both escapes, it is important to get the knee of their trapped leg back behind your legs. If they still have their knee past your legs, it makes it much easier for them to move straight into a half guard pass, by driving their knee to the mat and sliding through.
_____________________

Teaching Notes: The main interesting point from a teaching front wasn't on the technique, but the John Will method I've mentioned a number of times before. I always use it at the end, but a student asked if I'd be able to do it during the drilling too. The reason was that they realised there were some details they had been missing after doing the review at the end. I've considered putting in the John Will 'review' type method earlier, but so far I've only done that if it's an especially large class. Given that a student has asked for it, I'll try using it in all classes for the next week and see what impact that is. It will slightly shorten drilling time, but potentially worth it if it gets the details across better.

23 April 2015

23/04/2015 - Teaching | Mount | High Americana

Teaching #315
Artemis BJJ (PHNX Fitness), Can Sönmez, Bristol, UK - 23/04/2015

Today I looked at some attacks from high mount, where you've gotten up right by their head. The first option I like to try is fishing out an arm and doing an americana against the leg (though the distinction between americana and kimura gets a bit blurred). Your knees are by their ears, squeezing in tight, causing their arms to cross over their face. For this attack, you need to be able to thread your arm by their crook of their elbow.

Grab their wrist with your other arm, using your initial arm to grip your own wrist (same configuration as if you were doing a kimura from north-south). Making sure your knees are squeezing in tight, bend their arm against your leg for the submission. Be sure to use the turn of your body, rather than purely your arms: you'll get more leverage that way.

If they have managed to hide their arm, swing your torso around so that your ribs are pressing against their forearm. That wedge means you can now walk sideways on your toes to roll them and take the back. You could go all the way until they end up flat on their belly, for what is arguably the most dominant position in BJJ, full back mount. However, if you do that, I'd recommend getting an arm under their neck before you fully roll them over, as it can be irritating to dig your hand in once they are completely flat (after all, there is a reason judoka treat that paradoxically as a defensive position, used to stall for a few seconds in competition so they get stood back up).

My preference is to instead walk them just far enough to get them up on their side. From there, I can then move into technical mount. That then provides lots of options, with chokes, armbars and a back take all available.
_____________________
Teaching Notes: I went with the americana against the legs followed by a back take this time, as that seems like a logical combination. If you can't get the americana because they've hidden their arms, the back take should be available. Next time round, unless there are loads of beginners, I think I'll focus a lot on technical mount over the month: I could go through chokes, armbars, back takes and indeed escaping technical mount, so lots of options. It would fit nicely with a month on the back either before or after.

One thing I could have added was blocking attempts to slip out the back. I mentioned that it's a common escape attempt (and what Chris did to me yesterday when I got really high), but not too much on the defence. The main thing I do is just grab the back of their collar to anchor my mount, then wriggle back to flatten them out (as they normally start curling their legs over to push into your armpits).

I could also potentially bolster this lesson with more details on getting those elbows up really high, but then I covered that in a separate lesson. I talked about 'spider-walking' your hands up when you've hooked an elbow, as that can be handy, but I'm not sure that's an area I want to go into depth on this one. Then again, I was thinking that my high mount maintenance lesson could perhaps do with a finish, like a back take. Still early days with this particular lesson, so I need to make sure I take a good look at these notes for next time. ;)

09 April 2015

09/04/2015 - Teaching Notes at PHNX | Ezequiel Variation

Teaching #306
Artemis BJJ (PHNX Fitness), Can Sönmez, Bristol, UK - 09/04/2015

Today I ran through various mount attacks, then answered a few questions about related side control chokes. I had a play trying out that variation of the ezequiel choke too, seeing if that was a useful alternative. Drilling, we found it's hard to do without raising up, though that might be because I don't have it tight enough. I still like the ease of setting it up though, and trapping the arm must have some potential.

The choke, shown to me by a visiting purple a while ago, is similar to the lapel attack I like to do from side control, where you feed your gi to the hand you have under their head (something you can set up from mount too, dismounting to side control for the finish). Even more fun, if they are being super-defensive and crossing their arms to block a choke from mount, that's where the ezequiel variation comes in.

Pull their gi lapel up and over their bent arm, feeding it to the hand you have under their head. Bring your other arm underneath that lapel, cutting the hand down by the side of their neck, like you would for a standard ezequiel. You can then finish the choke pretty much as normal. If you start off with the gi lapel slightly loose, it's easier to slip your other hand under, before tightening it right up. I'm going to continue playing with this, as well as checking back with that purple to see how it's been working for him in the months since he first showed it to me.

02 April 2015

02/04/2015 - Teaching | Mount | Maintaining Low Mount

Teaching #303
Artemis BJJ (PHNX Fitness), Can Sönmez, Bristol, UK - 02/04/2015

Tonight was a repeat of yesterday, except that due to the small numbers and longer time span, I went through a few more techniques too. Thursday is frequently a repeat of Wednesday, so rather than just copy and pasting the technique part, I'll simply write up some quick notes.

In addition to the low mount, I then tried teaching that progression I was talking about yesterday, starting with the ezequiel. It's the main choke from the low mount, though being on the receiving end, drilling it you have to be careful you're not just jamming a hand into their throat. That's certainly something worth emphasising to people when drilling: do it slowly, get the placement right, then try and put it on. Otherwise, sore throats, which doesn't do anybody any good. ;)

That shifts nicely into getting them to raise their elbow for high mount, where you can then talk a bit about the different ways to shift up into the high mount. The main ones are grabbing the top of the head to help pull you up, elbows on top of their shoulders, or that cool trick from Dónal about pushing their shoulders with your hands and stiff arms. I didn't go into all the details about high mount, as that really needs a whole class. Nevertheless, it was useful to see how the teaching progression from low mount to ezequiel to high mount could work. :)

19 March 2015

19/03/2015 - Teaching | The Back | Rear Naked Choke

Teaching #298
Artemis BJJ (PHNX Fitness), Can Sönmez, Bristol, UK - 19/03/2015

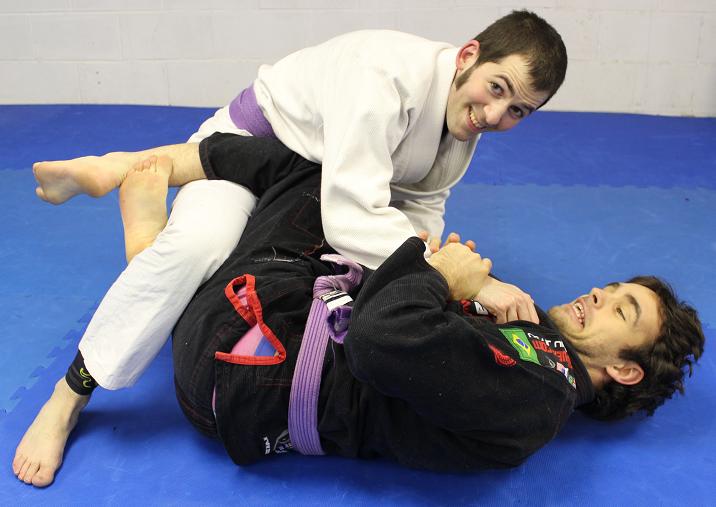
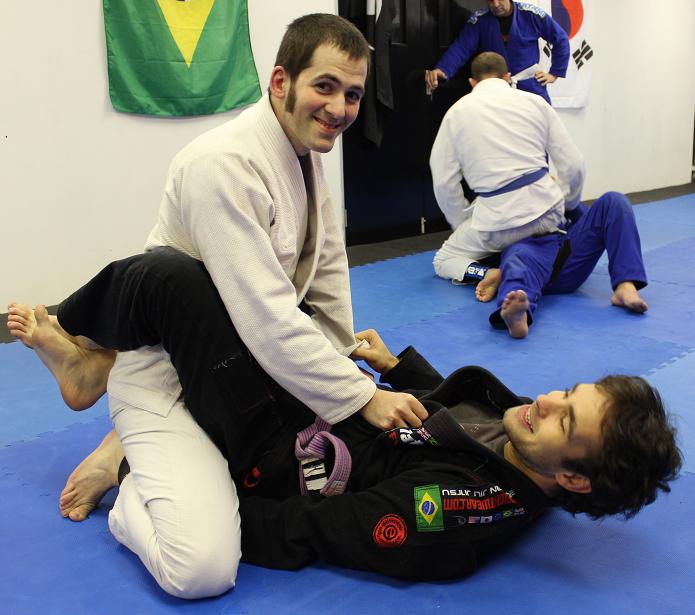
The RNC is a fundamental technique to BJJ. Everybody with more than a few lessons under their belt knows that you're going to be looking for it, so they will immediately be trying to create barriers with their arms and hands. However, as this particular class has plenty of absolute beginners, I focused on the basic application before getting into the set-up.

So, to apply a rear naked choke (the reason for that name is that you aren't using the gi to complete the choke, hence 'naked'). Position the elbow of your choking arm under their chin. You don't want to leave any space, as the idea is to press into both sides of their neck. This will close off their carotid arteries and prevent the flow of blood to the brain. That is an efficient and safe way of subduing an opponent.

Reaching past their shoulder, you are then going to grip the bicep of your free arm. This is to lock the choke in place. It will normally be difficult to grab your bicep straight off, as your opponent knows that's dangerous. You can instead secure your initial arm by gripping the back of their shoulder. Stephan Kesting has a useful video on RNC details, where he talks about holding the ridge of bone at the bottom of the shoulder blade, using what he calls a 'tiger palm'. From there, switch to gripping palm to palm over their shoulder, dropping the elbow of your back-arm down along their shoulder blade. That will further help to lock it in position: as Demian Maia demonstrates, you can even finish the choke from there. If not, you can then do what Kesting calls the 'creep', wriggling that elbow across their back to cinch up the choke.

When you have managed to grip your bicep, make sure both your elbows are in front of their shoulders. In other words, your armpits are resting on their shoulders. The elbow drops straight down. As Nathan 'Levo' Leverton emphasises, this now means that both your wrists are hidden, making it difficult for them to strip your grip. It also makes the choke tighter, as both of your arms are directly by their neck.

Bring the hand of that bicep arm to the back of their head: a commonly used version is to press the palm into their skull, but there are various options, coming down to personal preference. Using the back of your hand against their neck is arguably better, as that may slip in more securely than palm down. Also, palm down is easier for them to grab, if they try to peel your fingers off their skull. Either way, when you're locking in the choke, don't reach your hand forward over their shoulder. If you do, then they can armbar you using their shoulder as a fulcrum. Instead, slide it behind the head.

Bring your head next to theirs on the bicep gripping side, to further cut off any space. If for some reason after grabbing your bicep you can't get your other hand behind their head, grab your own skull, using that grip to finish from there. Staying close to their back, expand your chest and squeeze your elbows together.

A common problem is that people will also tend to tuck their chin. Some people advocate unpleasant methods to force your way through to the neck in that situation. For example, Stephan Kesting has a list here: the results of that kind of approach (though Kesting does make a point of saying he is not fond of pain-based options either) can be seen in this video of a brutal Baret Yoshida match. That is not how I want my jiu jitsu to look.

My goal is smooth, technical, leverage-based jiu jitsu, causing as little pain to the other person as possible. As Saulo says in my favourite BJJ quote:

"You have to think that your partner, the guy that you're training [with], has to be your best friend. So, you don't want to hurt him, you don't want to try to open his guard with your elbow, make him feel really pain, because jiu jitsu is not about pain. You have to find the right spot to save your energy"

I strongly feel it is best to avoid hurting your training partners, for four additional reasons:

  • You're in class to learn, not to 'win' at all costs. Save the 'win' mentality for competition.
  • If you're always hurting the people you spar, eventually nobody will want to train with you, making it rather hard to improve.
  • Presuming you're in BJJ for the long-term, you're going to be spending a lot of time with your training partners. Therefore it would make sense to build a good relationship.
  • Even if you don't care about your classmates, everybody has a different pain threshold. So, the efficacy of pain-reliant techniques will vary from person to person. The efficacy of leverage does not: that's based on physics, not how tough somebody is.
There is a less nasty option you could try for opening up their chin, from Andre Galvao. If they really shove their chin down, this may not work, but it is worth a go. Twist your hand so that your thumb is pointing down, then as you slide the arm to their neck, twist the thumb back up to lift their chin.

If I find I have no option except something brutish (e.g., crushing their chin until they tap from pain or lift their head), my preference is to instead transition to a different attack, like an ezequiel, a bow and arrow choke or an armbar (which I'll be covering in later lessons). In my opinion, if I get to the point where force and pain are the main routes to finishing a submission, then my set up was poorly executed.

You can also try tricking them into giving you access to the hold you want, a handy tip I saw on a John Will DVD. For example, when you try to get an arm around their neck, a common reaction on their part is to grab your arm and pull it down. If you respond by pulling up, they will normally pull down even harder. This means that if you time it right, you can suddenly switch direction and swing the arm they are pulling down across your body. This should sweep their arms out of the way for a moment (try to catch both of their arms when you do this). Make sure your other hand is ready and waiting near their shoulder, as you can then immediately bring that other arm across their suddenly undefended neck.

Even better, you can take their arm right out of commission. With one of your hands, grab their wrist. Shove it down towards their legs, then step over that arm with your same side leg. When you then re-establish your hook (or pin your heel to their ribs, or put your leg behind their back), they are left with only one arm to defend against both of yours. If they've grabbed your wrist, twist your palm outwards, shove it down and out, then again step over their arm with your leg. Make sure you maintain pressure, so they can't simply swim their arm free.

There is also the method I learned from Dónal. Grab their wrist with your armpit hand. Drop to the choking arm side, twisting your hips to increase the range of motion for your leg. Shove their arm down, then swing your leg over your armpit arm. Grip your own shin with the armpit hand, then using both your leg and arm, get your foot to their spine to trap their limb.
________________

Teaching & Sparring Notes: I went with the pattern from yesterday, combining the basic RNC application followed by swinging the arm and the thumb chin-lift. As I have that extra bit of time on Thursdays, I added in the armbar from the back. I really want to come up with something more cunning for getting the arm and the leg over the head: there must be a swisher way of doing that.

Breaking the grip for the armbar, Steve surprised me by grabbing the material on my trouser leg. You can still kick that off, but it felt a bit more awkward. I assume it is a weaker grip, as it locks my leg to them, but interesting. Then when sparring, I started without grips from the back. Steve grabbed my hands this time, making it tough to set up any kind of attack (especially as he's a powerful guy). Of course, it does mean that he couldn't do anything either. Stalemating, so is it just a matter of patience to wait for them to move?

I want to practice escapes some more, work on the on where you pull the arm over the head. On trying to apply the armbar from the back myself, Steve was able to turn and stack me. So, I messed up somewhere along in terms of keeping him flat: probably I jumped into it too early with insufficient control. I should establish a better kimura grip, as well as more effective use of my legs. It would also be worth checking Ryan Hall's DVD next time, as he had a lot of good details for back attack (Chris and I drilled a bunch of them a while back).

12 March 2015

12/03/2015 - Teaching | The Back | Bow & Arrow Choke

Teaching #294
Artemis BJJ (PHNX Fitness), Can Sönmez, Bristol, UK - 12/03/2015

This week, I decided to focus on the bow and arrow from the back. Starting from standard back control with a seat-bet grip, you open up their collar with the hand you have under their armpit. Fold it over (a handy tip from James '300' Foster), then grip it with the hand you have over their shoulder. Don't grip too high, or you'll lack the range to finish the choke.

Next you want to get hold of their non-choking side leg. If you're having trouble grabbing it, Dónal suggests using your same side heel to dig in by their knee, curling your leg back. That should bring their trouser leg in range for you to grab with your free hand, establishing a good anchor point. You then want to swivel your body, in order to get your leg-grabbing side foot to the outside of their other thigh.

I tend to push off their non-grabbed leg side thigh with my same side foot, to help me move my other foot over. Once you've got that foot locked in place, you want to keep it there to block them from trying to turn into an escape. Along with your initial grip on their leg, that hook with your foot gives you better leverage to move into the main choking position.

To get there, swing out your non-hooking leg. You want to end up with your opponent's head on the thigh of that leg you just swung out. Tuck the elbow of your choking arm back by your hip, as pulling on the elbow is one of the main escapes. To finish, pull your hand down, pressing your forearm into their head. If that doesn't work, you can try increasing the range by gripping with less fingers (though this does make your grip weaker). Putting a leg over their shoulder and then crossing your feet can give you more leverage, as you can then thrust your hips up into the choke.

If that still isn't getting the choke, try bringing the hand that was gripping their leg behind their head, driving it through to push their head forward as you lock in the choke. For even more leverage, you can bring it under their arm. That then sets you up for yet another follow-up submission, moving your leg over their head to switch into an armbar.
________________

Teaching Notes: Another interesting point for me to consider popped up today, which is generating leverage by leaning back. I prefer staying tight, not giving them space, but it's a valid way of finishing the choke. I guess that also fits well with the armbar. I still want to bring in Dónal's grip break at some point.

05 March 2015

05/03/2015 - Teaching | The Back | Weekly Recap

Teaching #290
Artemis BJJ (PHNX Fitness), Can Sönmez, Bristol, UK - 05/03/2015

I recapped Monday and Wednesday, then as it was a small class, I also added in several other bits and pieces. First up, Marcelo Garcia's back retake, where they've completely cleared your legs. If that happens, maintain your seatbelt grip and sprawl out. Walk back on your toes until you're directly behind them, then bring your knees close to their back. From there, you can re-establish your hooks.

After asking if there was anything specific people wanted to go through, the response was attacking the turtle. I had enough time, so ran through the basic crucifix entry, followed by a clock choke and a simple turnover, Levo style. Using your hand as a hook is such a handy (yay, puns!) tip, one of the most useful things I learned from Levo among the many, many useful things his Leverage Submission Grappling seminars cover.

The crucifix is probably a bit advanced to throw in like that, but then again, I was using it to illustrate some of the options from the turtle, as the specific question was about the student not knowing what to do when somebody turtles. I'm especially pleased that when he attended the GrappleThon, Steve told me that he'd managed to land that same clock choke I taught him in this lesson (I'm writing it up a week later, rather than time travelling ;P).

26 February 2015

26/02/2015 - Teaching | Half Guard | Passing Knee Shield

Teaching #286
Artemis BJJ (PHNX Fitness), Can Sönmez, Bristol, UK - 26/02/2015

First off, if their knee shield is high on your chest, it will be more difficult to push down. You can try shoving it down with your hands, but that not only exposes you to potential attack, it gives them a chance to move away and you might lose your passing opportunity. Try to use your bodyweight if possible. You then need to make sure they can't move their hips: in today's pass, I wanted to show how you can accomplish that by pinning either their lower or upper leg. You also want to block their upper body, in order to pin them in place. Finally, you need to get used to sliding over and past their upper leg while still maintaining maximum downwards pressure.

My preference is what Jason Scully calls the staple pass. To control their upper body, Scully puts his head down onto the mat by their armpit. His far arm has the elbow close to the mat, which is similar to Saulo's version that I've taught before, although Scully notes you can reach for an underhook. Also like Saulo, he takes hold of the lower knee with his hand to stop them moving: this accomplishes a similar result to what Dónal does, driving his knee across into their hip.

The 'staple' part is a little different. Similar to how you can circle back with your leg to add a brace for the half guard pressure pass, to beat the knee shield you can rotate your lower leg back to brace against the lower part of their bottom leg, in order to hold it in place. Cut your other knee across, basing the bracing leg out and stepping it forward. From here, it is possible to continue through and pass like Saulo.

However, Scully's version involves a change of direction. Shift your grip to their top knee, clamping that to the mat. Use that, your other arm and your head for base, then hop your legs over to the other side, establishing side control. It is much the same motion as in Kev's xmas guard passing drills a few years ago.
_____________________

Teaching Notes: I do this mainly with a sprawl when I use it myself, but added in the leg hooking bit, or 'staple' as Scully calls it, as it's a useful addition. Also, great turn-out tonight, plus our first female student on the Thursday! :)

To remind myself of bits from last time, I'll add in some older notes. I mentioned before that I emphasised that John's excellent theoretical framework for control in BJJ applies here too. I should also take another look at Dónal's version from back in 2013, where he drove his trapped knee through, into their hip. Dónal also flattened them onto their back. Then there's the Ribeiro method, I'll review that for next time too.

19 February 2015

19/02/2015 - Teaching | Half Guard | Opposite Side Pass

Teaching #282
Artemis BJJ (PHNX Fitness), Can Sönmez, Bristol, UK - 19/02/2015

Same class as yesterday, as there were different students present compared to Wednesday. I first learned this pass from Roger Gracie a few years ago, getting some further great details from Ed Beneville and Tim Cartmell's excellent book. Beneville and Cartmell refer to the position as 'inverted half guard', but I prefer Saulo's nomenclature from Jiu Jitsu University: he uses the term 'opposite side pass'.'Inverted' is mainly associated with being upside down in BJJ, so I'll stick with Saulo.

The orthodox method to pass the half guard is to get a similar 'super-hold' (as Xande calls it) as you would in side control, then use shoulder pressure to hold them in place as you bounce your leg free and slide through. That's what I taught earlier this month. With the opposite side pass, you're also trying to control their upper body. In Saulo's version of the pass, on p307 of his book, they already have an underhook. He therefore grips over the top of that underhooking arm, securing it by gripping the gi material by the small of their back.

Posting on his free hand, he then swings his free leg over, ending up sat next to them. He suggests grabbing their knee initially, then shifting to grabbing the far hip. If you prefer, you can grab the knee and maintain that grip, to prevent a counter they can try where they open their half guard then hook under your knee. They can then lift and drive through to the top position.

My personal preference is to start the pass by reaching under their head with the arm on the same side as your trapped leg. This may feel counter-intuitive, as normally that is the arm you would use to underhook, but that's because you're swinging over to the other side. This is effectively a cross-face on the opposite side, which you lock in fully once you're over to the other side, driving your shoulder into their cheek/jaw to prevent them turning their head towards you. It's also key that after swinging to the other side, you post firmly on your outside leg, angling the knee towards their body. This should stop them bridging into you and getting a reversal.

Finally, you need to extricate your trapped leg. The simplest approach is to push on their bottom leg with your free foot, extricating yourself from half guard and taking top side control. The problem with that is it reduces your base, so they might be able to capitalise and reverse you. Not to say it isn't possible, but it requires your cross-face to be really solid. A slightly safer option is to step the basing leg in front of their leg, using it as a wedge. That means it both blocks their movement but still provides you with base. Another possibility is pulling their leg towards you in order to help create the space to free yourself.

A slight variation on this pass comes from the Beneville book: if you can get this one, it's probably the tightest option. Before you swing over, open up their lapel on the free leg side. Pass the end of their gi to the hand you have under their head and feed it through. Push their head slightly towards the trapped leg side, then shove your head in the space you’ve created. You can use your head for base, along with your free hand if required.

After you've swung over, watch out for a counter they may try, which is to lift up your leg with their far foot, flipping you over. To re-counter that, immediately switch from holding the knee to hooking behind their knee with your arm. That should stop them lifting for the sweep. Alternatively, you can also do a big step over to the other side as they try to flip you to your back.
________________

Teaching Notes: The extra fifteen minutes on Thursdays meant I could run through a variation on the pass, which is useful but I don't think it's essential to teach. I'm a big fan of the two passes I taught this week and use them in combination to pass half guard. However, I'm wondering if I should be looking to expand my repertoire for passing half guard. Either way, I'll be moving on to knee shield next week, with some basic maintenance, a couple of sweeps and a pass to finish off February.

12 February 2015

12/02/2015 - Teaching | Half Guard | Whizzer Counter Roll

Teaching #278
Artemis BJJ (PHNX Fitness), Can Sönmez, Bristol, UK - 12/02/2015

BJJ Bristol Artemis Brazilian Jiu Jitsu - Half GuardI continued with simple sweeps from underneath, teaching what Gordo (the guy who effectively created the half guard as a viable position) calls 'Plan B'. I don't think that's very descriptive, so I'm going with whizzer counter roll.

The situation is that you've managed to get the underhook under half guard, but they've threaded their arm through in what's called a 'whizzer'. That ruins your back take, but it doesn't stop you sweeping them. Indrek Reiland shows how you can still do the toe grab, or you can do a counter roll movement. With your free hand, push their knee outwards to disrupt their base: you can also underhook that leg if you prefer. Dive your body underneath them, putting your head into the gap between their arm and their leg.

Finally, bring your whizzered elbow back towards their head, aiming to clamp your elbow to your side (as much as you can in that position). From here you should be able to roll them over fairly easily. If you need some additional help, try tweaking their leg out like you do with the toe grab sweep.
_____________________

Teaching & Sparring Notes: Thursday classes end up in a different format to the two mixed classes at MyGym, for three reasons. Firstly the Thursday is longer, the mat space is bigger and there tend to be less people. I often fit in two techniques rather than one, so tonight also inluded the toe grab sweep in what became a general recap of Monday and Wednesday. I added in the Bravo version of the toe grab sweep for variety too, which was interesting to watch in terms of how the students worked through it. Initially they were saying "cool, that's simpler," because Bravo doesn't switch his grips. He gets the underhook and grabs the foot, then sweeps from there.

However, in progressive resistance, the students reverted to the grip switch, because with Bravo's method they couldn't get the leverage. Of course, they aren't starting from the lockdown, which makes a difference (though I did mention that too). The whizzer counter roll went smoothly as it always tends to, plus one of the students commented how they whizzer quite a lot (looking for the D'arce. Brabo? Whatever it's called, I get those mixed up all the time). So, useful when rolling with him at least. ;)

The smaller numbers on Thursday has the advantage that I often get to join in sparring, mainly during specific sparring. Rather than putting people into two king of the hill groups based on weight (like I do on Wednesdays, as that's the biggest class), Thursday it's a case of one person in the middle with everyone else switching in. I therefore practiced passing, using the pressure pass and reminding myself of the Xande cross-face alternative. If you can't get the cross-face, you can stick your head next to theirs and use that control instead. My neck was a little sore after class, though I'm not sure if it was me doing that wrong, or a sloppy escape out the back I did later.

Underneath, Braulio's arm shield worked well for me, to the extent that I think it actually fits better into my approach than the paw block. Keeping EstimaInAction in mind, I attempted to shift into deep half guard from there, but without much success (Braulio goes into the waiter sweep, whereas I prefer the Homer Simpson sweep: I wasn't getting either). Nevertheless, I felt considerably safer than normal, so I'll be sticking with the arm shield for the rest of this month.

Another type of shield caused more problems. I am not getting anywhere using the knee shield, in terms of sweeping. I know that there is a viable scissor sweep into back roll from here, as I've used and taught that in the past, but I must be forgetting a key element (probably to do with their weight distribution). I can get the position, then end up uselessly straining to move them with the sweep. Back take might be a good one to throw in there too, as that can work well off the knee shield. Braulio's version is very different to the kick and reach I'm used to, as he does something with the belt on EstimaInAction. Something to try I guess, though I don't like techniques that rely on belt grips (unlike the gi, the belt can loosen and fall off, so it doesn't feel secure).

05 February 2015

05/02/2015 - Teaching | Half Guard | Maintaining, Back Take & Guard Recovery

Teaching #274
Artemis BJJ (PHNX Fitness), Can Sönmez, Bristol, UK - 05/02/2015

In half guard, your first concern is to stop them flattening you out and starting their pass. They are generally going to want to establish an underhook on their trapped leg side, using the other arm to control under your head. In many ways, it is a similar position to standard side control. That will enable them to crush you to the mat, then exert lots of shoulder pressure to kill your mobility. Many of the same attacks from side control can also be viable from here, like an americana.

Naturally, you don't want them to reach that dominant position. Your goal is to get up on your side, with your own underhook around their back, on your trapped leg side. That is one of the main fights you'll have in half guard, so it is essential that you get used to working for that underhook.

If you can get the underhook, that accomplishes two things. First, it prevents them crushing their chest into yours, which would help them flatten you out. Second, it means you can press into their armpit to help disrupt their base, as well as help you get up onto your side. You can use your knee knocking into their bum at the same time to help with this too, as that should bump them forward.

For your leg positioning, the standard half guard is to have the inside leg wrapped around with your foot on the outside. Your other leg triangles over your ankle. This provides you with what SBG refer to as a 'kickstand': that outside leg is useful for bridging and general leverage. It's harder for them to flatten you out if you can resist with that kickstand structure.

After you've controlled a leg, got the underhook and onto your side, you want to block their arms. Almost a decade ago, Indrek Reiland put together an awesome video (made even more awesome by being free) about the fundamentals of half guard. The main principle I use from Reiland is what he calls the 'paw'.

By that, he means hooking your hand around their bicep, just above the elbow. You aren't gripping with your thumb: this is just a block, to prevent them getting a cross-face. Reiland emphasises that preventing that cross-face is the main principle. Therefore, if you can feel they are about to remove your paw by swimming their arm around, bring your underhooking hand through to replace your first paw with a second: this is what Reiland calls the 'double-paw' (as he says in the video, it's an approach he learned from SBG black belt John Frankl).

Similarly, if they manage to underhook your underhook, bring that arm over for a double-paw (this is also applicable from the start, if you're framing against their neck), then work to recover your underhook. Keep in mind with the double-paw that you need to make sure you don't leave space under your elbow. Otherwise, as Reiland demonstrates, they can they go for a brabo choke. Get the elbow of your top double-pawing arm to their nearest armpit, as that makes it easier to circle your arm around to their back.

From there, you have two primary options. First, try to take the back, by whacking your underhook into their armpit and simultaneously scooting down their body. Pull your paw arm back, so that you can base on that elbow, then base on the hand. That should give you the balance to reach around to their lat with what was your underhooking arm, as well as swinging your leg over their back too. Establishing a hook by digging the heel of that leg you just swung over inside their knee. Finally, get a seatbelt grip (one arm under their armpit, the other over their shoulder, locking your hands together) and roll towards your non-hooking foot.

If their base is too solid to go for the back, you can recover full guard instead. You still want the underhook: if you need to make space, keep bumping until you can at least get your elbow by their armpit. You can then use that to pry up some space, circling your arm around for the underhook. Switch your leg positioning so that your 'kickstand' steps over their leg, hooking underneath their lower leg with your instep. Keep your legs tight, or they will pull their leg free.

Curl towards their same side knee on your paw-arm side, until you can push it out with your elbow. Get the knee of your inside leg up past that knee, which will enable you to shove their knee back and free your leg. From there, swing both legs around their back and lock your ankles for closed guard. I like to also shift from a paw to an underhook around their arm, trapping it to my chest, but that isn't essential.
_____________________

Teaching & Sparring Notes: It's a slightly longer class on Thursdays, meaning it functioned as a recap of the week's techniques. I like being able to do that at PHNX, where it also makes sense as the people who come to this class often don't make it to many (or any) of the MyGym classes in St Paul's. I went through the usual selection, then had a good bit of time left over for some specific sparring and free sparring. My groin injury is getting to a stage now where I can roll relatively normally, though I still have to hold off on certain sweeps and transitions.

Still, it meant I could finally get in some proper rolling with Nacho, which was cool, as I've been looking forward to experiencing his game. It's an interesting challenge trying to both pass and control somebody who is adept at inverted guard, especially when they're constantly looking to take your back with a berimbolo. My counter at the moment is rather clunky, so I need to refine that more, though it did seem to just about work (although I imagine Nacho was going easy as he knows I'm injured). I focused on controlling the legs and feet, as well as establishing some kind of grip by those control points (so, head, shoulders and hips).

That repeatedly involved me getting a firm grasp of the gi lapel, digging my head and/or shoulder underneath a leg, then gradually crawling into place for side control. I wasn't able to hold if for long when I did get to side control (or more commonly, north-south, given the nature of inverted guard). That gives me some fun stuff to work on: maintaining on top is somewhere I generally feel fairly comfortable. It's good to be knocked out of your comfort zone, as I'm forced to think harder. I'm also gripping harder, which is bad, as that's not a long-term solution (i.e., my grips are already sore after training, so in ten, twenty, thirty etc years, it won't be viable).

29 January 2015

29/01/2015 - Teaching | Butterfly Guard | Knee Forward Pass

Teaching #270
Artemis BJJ (PHNX Fitness), Can Sönmez, Bristol, UK - 28/01/2015

This time, you haven't managed to flatten them out before passing: they are still upright and ready to sweep. Reach over their back and secure a grip under their opposite shoulder blade, leaning slightly to the opposite side. Post on that side with your hand, or grab their knee. Step up your leg on the same side as your reaching arm, tight to their leg, so that the inside of your knee is pressing into the outside of theirs. If it isn't tight, they'll be able to exploit that space, perhaps hooking and initiating a sweep.

Using your upright knee, turn and push their knees in the opposite direction (if you're wondering what to do with your other arm, Saulo suggests basing on the floor with it). The idea here is to clamp their knees to the mat, pressuring through the side of their top knee. Ideally you want it right on the knee, rather than on the thigh or lower, though that would still be effective to a degree. Replace that pressure with your non-gripping hand, keeping the arm straight to use your skeletal structure rather than muscles. You can then pass to side control or possibly take their back, depending on their reaction.
________________

Teaching & Sparring Notes: I included that Saulo lean, but I'm not sure how he uses that hand for base, if he's leaning away. I think I need to rewatch the video on BJJ Library. I was tending to put my hand on their other knee, rather than basing on the floor like Saulo does in his video.

I was pleased to get in a little bit of sparring again, where I practiced stiff arm guard some more, combining with tripod and sickle sweeps. I was able to knock them down, but I'm not coming up quickly enough afterwards or pinning the leg. That's something I'll try to focus on in sparring, but generally the stiff arm has been a big help and improved my retention quite a bit (at least with white and blues, so I guess that's not a true test yet).

It was cool to have Nacho there (also cool to FINALLY get in some sparring with him, though I think he was going easy because I'm still injured). When Steve asked about passing Nacho's inverted guard, I decided it was better to just ask Nacho. Sure enough, he was able to show what looks to be a good option: bring your forward knee into the back of their knee, then squash through for the pass. At least that's what it looked like, I was the one being demonstrated on so may not have seen it properly. I'll have to ask again on Saturday if he's there, or if Steve remembers it. :)

22 January 2015

22/01/2015 - Teaching | Open Guard | Butterfly Sweep

Teaching #266
Artemis BJJ (PHNX Fitness), Can Sönmez, Bristol, UK - 22/01/2015

Marcelo Garcia has written that when passing butterfly guard, it's important to keep in mind that "unlike the closed guard or half guard, in the butterfly guard, your opponent is not trying to hold you in place." In my opinion, the ensuing dynamism and movement makes butterfly guard a more advanced position, which requires greater sensitivity and timing than closed or half guard.

So, I stuck with the most basic technique in butterfly, which is the classic butterfly sweep. There are three main grips to try. Two less common options are grabbing the neck, or grabbing the same side sleeve and collar (or neck and wrist in nogi): the latter can be useful if you want to transition to a choke in gi, or perhaps back to closed guard to go for a scissor or knee push sweep. On Carlos Machado's excellent Unstoppable DVD all about this sweep, he shows many more variations, but it is definitely a higher level instructional (so, I wouldn't recommend beginners pick it up). The orthodox method is to establish a deep underhook with your arm, reaching around their back and/or grabbing their belt.

Saulo Ribeiro emphasises that you must be close with the shoulder to generate sufficient leverage. Saulo also likes to put a hand out behind him for base (just like the cross-grip guard I've taught previously, along with the stiff arm guard I've been working on), which contrasts with others who prefer to grab the knee. It is worth experimenting with several options. One of the best parts about training in jiu jitsu is that it is so individual. There is rarely a single 'right' way to do any technique, which is also part of what makes jiu jitsu so complex.

If you've lifted them up but they aren't going over, try hopping towards your lifting leg with your other leg. That should eventually provide the leverage to knock them to the mat.

________________

Teaching Notes: I added in a couple of variations tonight, both of which I've taught before. The ankle pick is something I've previously shown from the cross grip/stiff arm guard, so possibly not as applicable (though it's easy enough to switch from butterfly to the stiff arm). Taking the back is more effective. On that, I'll emphasise bringing your foot to the outside next time - this is something I will probably teach again on Monday, before finishing off the month with a basic butterfly pass.

I was also able to get in some more sparring. I'm really pleased I'm getting in more sparring time, but I need to be careful I don't get overexcited and make my groin injury worse. Especially as the GrappleThon is in less than six weeks now: it would be annoying to not be able to take part in the rolling, to say the least!

My butterfly guard as ever needs a lot of improvement. I was generally switching into the related stiff arm guard, going for my ankle pick off that, or transitioning into the tripod/sickle combination (as Kev advised way back in that private lesson. I think I'll get another private on the same thing when I next pop up to RGA Bucks in February).

15 January 2015

15/01/2015 - Teaching | Open Guard | Bullfighter Pass (Drive Forward Variation)

Teaching #262
Artemis BJJ (PHNX Fitness), Can Sönmez, Bristol, UK - 15/01/2015

Tonight, the focus was driving forwards into them with the bullfighter pass, after you've established your grips inside their knees. That should generate a reaction, as they will kick back. Direct that kick to your side as you step around. Saulo likes to open out their far leg while pulling their near leg across his body. That motion should swivel them in place for an easy pass. Even simpler, as you drive in and they react, fire their legs out to the side as you step around.

Alternatively, if they don't react, you can still pass after having driven their knees towards their chest. Thrust one leg forward, then step back, pulling the other leg with you. Drive that leg into the mat with a straight arm and your body weight, then pass around on that side.

To finish the pass there are two main options. Either you can drop your shoulder into their hip, falling forward like in Monday's version. If the position you're in doesn't lend itself to that, then simply moving into knee on belly may make more sense. Experiment with both: it will depend on the configuration of your body once you pass their legs.

________________

Teaching & Sparring Notes: As it was a small class, we played with various other bits of technique from open guard, such as the tripod and sickle sweep combination. On the sickle sweep, it was more painful than usual, because my drilling partner pressed their whole forearm into my foot as they did a technical stand-up. However, that's not exactly wrong, it just hurts more. Either way, interesting, as I've not seen someone do it that way before. ;)

I still can't spar properly due to that groin injury, which was frustrating, but at least I'm able to spar to a limited extent. I went with the stiff arm from open guard again. Their response was to try and step inside my legs: that helped them close the distance, but if I was less reticent about driving forward for some kind of takedown, it could be risky. That's especially true if they step inside my leg, as then I can hook behind and move into a trip.

At one point he moved around to the back and got a nice choke, finishing off by pushing with the leg. Also, I can definitely feel grip strain in my hand afterwards, so I'm holding on too hard still, exacerbated by the whole week featuring a lot of heavy gripping. In free sparring, I returned to the "hold a kimura no matter what" approach once more. I was tempted to let go after he effectively got my back and I thought he might be able to sneak an arm round for the choke, but forced myself to hold on to it (on reflection, I guess it wouldn't have been that easy for him to finish the choke with one arm, though still possible). I eventually wriggled out and managed to get the submission from underneath side control.

I was holding the kimura with a thumb grip: that started to hurt as the kimura got twisted into all sorts of positions, so there's a clear example of advantages to a thumbless grip. Insisting on that grip meant some strain through the bicep a few times too, though not as much as the general grip fatigue from passing and stiff arming. I need to figure out some less grip intensive options to try when I want to give my fingers a rest. Butterfly is the obvious option if they're low enough in open guard, but I don't have much outside of heavy gripping styles for longer range open guard and passing.

08 January 2015

08/01/2015 - Teaching | Open Guard | Sickle Sweep

Teaching #258
Artemis BJJ (PHNX Fitness), Can Sönmez, Bristol, UK - 08/01/2015

The tripod sweep I always teach the previous lesson combines well with the similar sickle sweep: as always in BJJ, that almost certainly has other names (the most common alternative is 'hook sweep'), but I'm using the term from Theory & Technique (page 226). A good time to try this is if when you attempt the tripod sweep, they kick their leg free from your hooking hand. You could attempt to readjust to recover your position, but it is probably easier to pull yourself towards their other leg with your hooking foot, grabbing the heel on that side. Turn your body toward that newly grabbed leg, swinging your pushing foot over to that hip. With what used to be your hooking foot, chop back low on their other leg to knock them over.

Of course, the sickle works on its own too. Indeed, Rener teaches this before the tripod on Gracie University. The entry he shows is to hook their leg, pulling yourself in to grab their ankle, then switching into the sickle position: opposite foot on the ankle-grabbed side hip, then chopping low on their other leg with your remaining leg, using your calf or possibly your heel.

In order to get the angle, you'll have to turn towards them (or like Rener shows, hook their leg to pull yourself in. If you're going from the tripod, you'll already have their leg hooked). Note that when you follow them up after knocking them to their back, compared to the tripod sweep, your other knee will be raised. That means you'll need to make sure to shove their leg down and step over, enabling you to complete your knee slide. Remember, there is also the other option of trying the technical stand up instead.

While grabbing the heel is a perfectly viable grip, it is probably better suited to the tripod, as then you can use Kev's trick of jamming the heel against your hip. With the sickle your body is turned, so that's not easy to do. I'd therefore recommend grabbing the trouser leg for the sickle. That's because it means that once you've knocked them over, you can pin their leg to the mat while also pushing it away. That stops them from closed their guard. This is important, because the sickle sweep will end up with you with one leg in betweens theirs. Wait as long as possible to let go of the trouser grip: ideally, you want to wait until you've slid your leg out.
________________

Teaching & Sparring Notes: I repeatedly emphasised grabbing the trouser leg and keeping hold of it, as that's the part people were forgetting most often. Progressive resistance is good for highlighting that, as I encourage the drilling parter to trap the leg if the person sweeping doesn't keep that grip long enough. Positive reinforcement? Negative? Can't remember the right word. :)

I did remember to put in the knee cut drill this time, a good idea I think. I also did the hip thrust drill, but decided against the knee collapse part, as I'm wondering if that might be confusing people. Better to have a clear focus, so they know the key bit is thrusting those hips forward.

I was really pleased to finally get in some sparring, although I was also nervous as I haven't really done it (except with Chris, Tracey and her son) for a while now due to the injury. Passing was ok, though I might have been slightly too exuberant for the injury. As ever I went with the bullfighter, pinning their legs then dropping my shoulder. It's a good pass, but it does take a fair bit of energy.

On the bottom, that was the first time I've really had a chance to test the Ryan Hall/Kev style stiff arm seated guard, outside of those drilling sessions with Chris. It worked well, both in terms of the original purpose - giving my leg a rest - and preventing passes. With the first student, I wasn't able to get the ankle pick or loop choke, but to my surprise got a spider scissor sweep. It seemed to come easier than normal, perhaps because they were driving forward more to attack the stiff arm? Or they might just have been going light, because of my injury.

The second spar was less active, as I mainly just held him at bay. However, that's still a plus, as the second student is a big, powerful guy. If I'm able to hold them off - even if they were quite possibly going lighter than normal - then that's a positive outcome too. I need to think about setting up the loop choke better, as well as my grip.

I like this guard, but it does depend on that grip on the collar. I don't want to rely on strong grips, as my grip strength will fade as I get older, I'd have thought, along with any other physical attributes. Then again, I am quite possibly gripping too hard, rather than the grip itself being a bad long term idea (in terms of fading attributes).

It's Polaris tomorrow! I'm planning to watch it via live stream with a few of the students, but we're still deciding exactly where. Hopefully somebody has a big TV and a decent internet connection (I would use mine, but my internet connection has a very annoying habit of dropping out at odd moments. Not good for a live competition! ;D). I should get a chance to chat more to Dean and Steve about it tomorrow at open mat, given they were both interested.

18 December 2014

18/12/2014 - Teaching | Closed Guard | Sit-Up Sweep

Teaching #252
Artemis BJJ (PHNX Fitness), Can Sönmez, Bristol, UK - 18/12/2014

BJJ Bristol Artemis Brazilian Jiu Jitsu - Side ControlPersonally the sit-up sweep (also often know as the hip bump) has been my highest percentage sweep from closed guard. It also fits well with the discussion on posture from earlier this month, because the reaction you'll get when you try to break somebody's posture is often that they will lean back. That's a perfect time to go for the sit-up sweep. Handily, it also makes for a classic offensive combination with the kimura and guillotine, which I could show in future lessons (though as this venue has a lot of MMA people, they are probably pretty familiar with the guillotine already).

For the sit-up sweep, open your guard, then come up on your elbow. Your other arm reaches over their opposite shoulder. Keep moving diagonally, progressing from basing on your elbow to your hand. Your second base point is your foot, on the opposite side to your basing hand. Use those two base points to stay close to your partner, bashing them with your basing leg side hip. Keep swivelling, reaching further with your shoulder-arm to grab their triceps. If they try to put that hand behind them, you can pull back with your triceps-hand.

You're essentially swivelling on the spot. This should cause them to fall off balance. Once you get your knee onto the mat, twist your upper body so that you're effectively doing a take down. Ideally, you'll end up directly into mount. Even if this doesn't work because they're resisting so much, you should be able to follow up with a kimura or guillotine.
_____________________

Teaching Notes: It was a small class tonight, so there was scope to go through the kimura and briefly the guillotine as well. I'm confident teaching the kimura, but guillotines still aren't something I ever really use. So, I'd need a lot more drilling before I felt ready to teach a class purely on guillotines, judging by tonight. A good technique to learn, so worth investing some time (especially as I already go for the sit-up sweep a lot).

11 December 2014

11/12/2014 - Teaching | Closed Guard | Pressing Armbar

Teaching #248
Artemis BJJ (PHNX Fitness), Can Sönmez, Bristol, UK - 11/12/2014

For the pressing armbar, start by breaking their posture, then get an over-under grip (wrapping one arm around their head, the other under their arm). Get a gable grip (palm to palm) and then clamp down firmly on their shoulder.

Break their posture by pulling your knees to your chest, then wrap up their head with an arm. Reach your other arm under their same side armpit, clasping your hands together palm to palm and locking on their shoulder. Get your hips out to the side and extend their arm. Clamp their wrist between your head and shoulder. With your armpit arm, slide that up their arm, staying tight so they have no room to move.

Bring your leg up their back, aiming to squash them into the floor. If they are able to stay upright, they can drive into your and weaken your control. Push their head away with what was your head wrapping arm if you need to. Relock your gable grip, pulling your arm over their elbow to roll it up. That makes it hard for them to escape, as they need to get their elbow down to pull the arm free. To finish, pull down on their elbow.

Keep in mind that there needs to be some space to pull down into. If you haven't got enough on your side and you're holding too low with your head and shoulder clamp, you might end up just shoving their arm into your own chest. It's important to secure both their wrist and their shoulder for this to success. Nathan Leverton had a name for this at his LSG seminar: 'stick theory'. In other words, to snap a stick across your knee, you hold it at both ends, not just one.
_____________________

Teaching Notes: Similar things came up as to when I taught this at our central location last week, like making sure people got on their side and created some space into which to pull the arm. I risked joining in a bit with sparring this time, but mainly staying on top in guard. On the bottom I resisted the temptation to do much with my injured leg, meaning I got passed a lot and stuck under side control. But that's ok, at least I get to move a bit. In future, probably best for me to stick with specific sparring, maybe work on my passing. I'm thinking half guard might be an option too, or maybe open guard. Very frustrating either way, as I was just starting to feel like I was making a breakthrough with my guard problems. Grr.