Teaching #486
Artemis BJJ (MYGYM Bristol), Can Sönmez, Bristol, UK - 30/03/2016
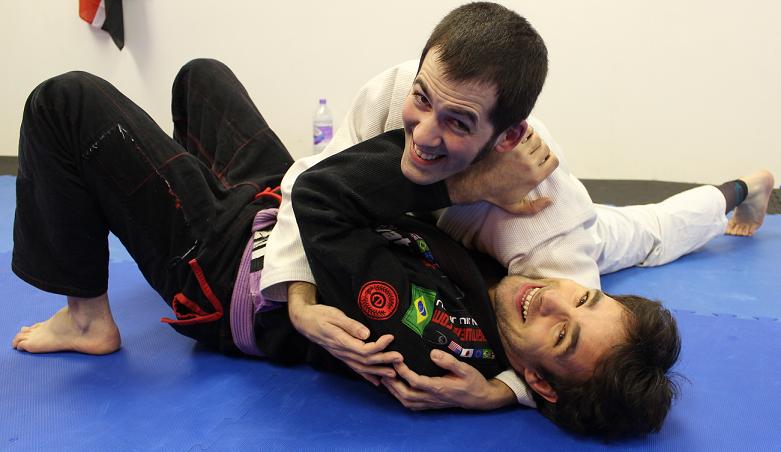
The second option I use for transitioning to mount from side control is the diagonal slide, which has a lot less steps compared to the reverse scarf hold approach. Start in side control, with a heavy cross face and your other arm under their far arm. Walk your other arm up the mat, until you can get their far arm tight to their head. At this point, you can grab just below their elbow with your cross facing hand, locking their arm to their skull (if you want extra control, you can use your head).
Drive your knee as high as you can on their body, sliding it diagonally over their chest. Aim to put your knee by their elbow. If you go too low, they may be able to snatch half guard. To prevent that, you can also use your free arm to block their legs, either simply shielding the area, or grabbing their near leg and pushing it away. The near leg is the one that will be on top if they try to drag your leg into half guard. If you have control of that top leg, it's impossible for them to get half guard: with just their bottom leg, they can't do much.
_____________________
Teaching Notes: Locking that arm to their head seems to be important, as that messes up their attempts to escapes during the transition. In one of the older Grappler's Guide video, Jason Scully uses this version too, although he does it a bit differently, with more use of his head: that's something I could try using more. I was also finding you could switch right into armbars off the transition, possibly kimuras too, especially if you were able to get them to reach up over your shoulder.
Some people didn't want to 'spider walk' their fingers, instead doing something that looked a bit like the 'butterfly stroke' from swimming. Whatever works, I guess, so that's one I'll keep in mind for next time. ;)
30 March 2016
30/03/2016 - Teaching | Women's Class | Full Guard Recovery from Half Guard
Teaching #485
Artemis BJJ (MYGYM Bristol), Can Sönmez, Bristol, UK - 30/03/2016
In half guard, your first concern is to stop them flattening you out and starting their pass. They are generally going to want to establish an underhook on their trapped leg side, using the other arm to control under your head. In many ways, it is a similar position to standard side control. That will enable them to crush you to the mat, then exert lots of shoulder pressure to kill your mobility. Many of the same attacks from side control can also be viable from here, like an americana.
Naturally, you don't want them to reach that dominant position. Your goal is to get up on your side, with your own underhook around their back, on your trapped leg side. That is one of the main fights you'll have in half guard, so it is essential that you get used to working for that underhook.
If you can get the underhook, that accomplishes two things. First, it prevents them crushing their chest into yours, which would help them flatten you out. Second, it means you can press into their armpit to help disrupt their base, as well as help you get up onto your side. You can use your knee knocking into their bum at the same time to help with this too, as that should bump them forward.
For your leg positioning, the standard half guard is to have the inside leg wrapped around with your foot on the outside. Your other leg triangles over your ankle. This provides you with what SBG refer to as a 'kickstand': that outside leg is useful for bridging and general leverage. It's harder for them to flatten you out if you can resist with that kickstand structure.
 After you've controlled a leg, got the underhook and onto your side, you want to block their arms. Almost a decade ago, Indrek Reiland put together an awesome video (made even more awesome by being free) about the fundamentals of half guard. The main principle I use from Reiland is what he calls the 'paw'.
By that, he means hooking your hand around their bicep, just above the elbow. You aren't gripping with your thumb: this is just a block, to prevent them getting a cross-face. Reiland emphasises that preventing that cross-face is the main principle. Therefore, if you can feel they are about to remove your paw by swimming their arm around, bring your underhooking hand through to replace your first paw with a second: this is what Reiland calls the 'double-paw' (as he says in the video, it's an approach he learned from SBG black belt John Frankl).
 Similarly, if they manage to underhook your underhook, bring that arm over for a double-paw (this is also applicable from the start, if you're framing against their neck), then work to recover your underhook. Keep in mind with the double-paw that you need to make sure you don't leave space under your elbow. Otherwise, as Reiland demonstrates, they can they go for a brabo choke. Get the elbow of your top double-pawing arm to their nearest armpit, as that makes it easier to circle your arm around to their back.
If you've been flattened out, then I find it is easiest to try and recover closed guard. It's generally more efficient to shift your leg positioning for this, bringing your outside leg over and hooking their leg, inserting your instep underneath their shin too. That leaves your other leg free to be pulled out. Curl your body towards your non-trapped slide, aiming to get an elbow inside their knee. Pry that open, while simultaneously attempting to wriggle your leg out. Once you get your knee/shin onto their thigh, you can square your body back up, using that knee/shin for leverage.
From there, it's the same technique as recovering closed guard from side control or mount. Hook your arm just above their elbow and grab your opposite collar/shoulder, to stop them pushing your knee down. Get control of their head with your other arm. From here, keep shrimping until you can bring your legs around their back for closed guard: how much you need to shrimp will depend on your flexibility. Going to open guard is fine too: butterfly can feel natural from here, but only do that if you feel comfortable with butterfly guard, of course.
Particularly for guard recovery, Braulio's alternative to the paw is a good option. Instead of hooking around their arm, he just 'facepalms' by putting his hand on his forehead. It's surprisingly effective at blocking their crossface, because they have to somehow get past your arm first. With that facepalm defence, you can dig underneath and get closer to their leg, ready to pry their knee away to recover full guard.
_____________________
Teaching Notes: I don't have anything much to add to this lesson now, it feels like it works fairly well. I remembered to include the facepalm, though I didn't put in taking the back in the warm-up. That might be worth including when I teach this in the women's class too, though it depends who shows up. I'm keen to keep this as a very entry level class to be as accessible as possible, but on the other hand, if only experienced women are there, it's worth mixing things up a bit.
Artemis BJJ (MYGYM Bristol), Can Sönmez, Bristol, UK - 30/03/2016
In half guard, your first concern is to stop them flattening you out and starting their pass. They are generally going to want to establish an underhook on their trapped leg side, using the other arm to control under your head. In many ways, it is a similar position to standard side control. That will enable them to crush you to the mat, then exert lots of shoulder pressure to kill your mobility. Many of the same attacks from side control can also be viable from here, like an americana.
Naturally, you don't want them to reach that dominant position. Your goal is to get up on your side, with your own underhook around their back, on your trapped leg side. That is one of the main fights you'll have in half guard, so it is essential that you get used to working for that underhook.
If you can get the underhook, that accomplishes two things. First, it prevents them crushing their chest into yours, which would help them flatten you out. Second, it means you can press into their armpit to help disrupt their base, as well as help you get up onto your side. You can use your knee knocking into their bum at the same time to help with this too, as that should bump them forward.
For your leg positioning, the standard half guard is to have the inside leg wrapped around with your foot on the outside. Your other leg triangles over your ankle. This provides you with what SBG refer to as a 'kickstand': that outside leg is useful for bridging and general leverage. It's harder for them to flatten you out if you can resist with that kickstand structure.
After you've controlled a leg, got the underhook and onto your side, you want to block their arms. Almost a decade ago, Indrek Reiland put together an awesome video (made even more awesome by being free) about the fundamentals of half guard. The main principle I use from Reiland is what he calls the 'paw'. By that, he means hooking your hand around their bicep, just above the elbow. You aren't gripping with your thumb: this is just a block, to prevent them getting a cross-face. Reiland emphasises that preventing that cross-face is the main principle. Therefore, if you can feel they are about to remove your paw by swimming their arm around, bring your underhooking hand through to replace your first paw with a second: this is what Reiland calls the 'double-paw' (as he says in the video, it's an approach he learned from SBG black belt John Frankl).
Similarly, if they manage to underhook your underhook, bring that arm over for a double-paw (this is also applicable from the start, if you're framing against their neck), then work to recover your underhook. Keep in mind with the double-paw that you need to make sure you don't leave space under your elbow. Otherwise, as Reiland demonstrates, they can they go for a brabo choke. Get the elbow of your top double-pawing arm to their nearest armpit, as that makes it easier to circle your arm around to their back. If you've been flattened out, then I find it is easiest to try and recover closed guard. It's generally more efficient to shift your leg positioning for this, bringing your outside leg over and hooking their leg, inserting your instep underneath their shin too. That leaves your other leg free to be pulled out. Curl your body towards your non-trapped slide, aiming to get an elbow inside their knee. Pry that open, while simultaneously attempting to wriggle your leg out. Once you get your knee/shin onto their thigh, you can square your body back up, using that knee/shin for leverage.
From there, it's the same technique as recovering closed guard from side control or mount. Hook your arm just above their elbow and grab your opposite collar/shoulder, to stop them pushing your knee down. Get control of their head with your other arm. From here, keep shrimping until you can bring your legs around their back for closed guard: how much you need to shrimp will depend on your flexibility. Going to open guard is fine too: butterfly can feel natural from here, but only do that if you feel comfortable with butterfly guard, of course.
Particularly for guard recovery, Braulio's alternative to the paw is a good option. Instead of hooking around their arm, he just 'facepalms' by putting his hand on his forehead. It's surprisingly effective at blocking their crossface, because they have to somehow get past your arm first. With that facepalm defence, you can dig underneath and get closer to their leg, ready to pry their knee away to recover full guard.
_____________________
Teaching Notes: I don't have anything much to add to this lesson now, it feels like it works fairly well. I remembered to include the facepalm, though I didn't put in taking the back in the warm-up. That might be worth including when I teach this in the women's class too, though it depends who shows up. I'm keen to keep this as a very entry level class to be as accessible as possible, but on the other hand, if only experienced women are there, it's worth mixing things up a bit.
27 March 2016
26-27/03/2016 - GrappleThon for One25
For my fifth GrappleThon, I decided to support a charity I've been aware of for a number of years (due to their strong presence at various feminist events around the city), but didn't actually know all that much about. A student at Artemis BJJ suggested we pick One25 this year, as she had direct experience (through her work in the prison service) of the excellent work they do to help vulnerable women break free from lives of addiction and poverty. Like 2015, we again organised a weekend in March: I had planned to go for later in the year, but this way we could tie in with the One25Live fundraising drive.
Just like every year, our two longest serving sponsors immediately came on board: Tatami Fightwear and Meerkatsu. They've both been staunch supporters since the first GrappleThon I ran in 2012. A more recent sponsor was also quick to pledge their support, GIMONO, once again offering the brilliant prize of a GIMONO gi to whoever raised the most money for One25. MYGYM generously allowed us to hold the event on their spacious mats for a second year, the gym owner getting stuck in to the extent that he helped to put up the One25 banners on the day. Other friends from MYGYM also joined in, with David and Natalia from Move Strong offering free kettlebell and kaatsu training on the Sunday. Lisa Chappell returned with her very popular massage table, then finally we had new support from Idee Pure, who provided a number of their soaps for fundraising prizes.
Another essential part of the GrappleThon comes from Wales, or more specifically, Aberystwyth. The West Coast BJJ team have been sending the biggest single group of grapplers over to Bristol since the 2014 GrappleThon, as well as raising a significant chunk of the total donations. This year, they were led by Katja Birkett, whose grappling skills got a lot of kudos from the higher belts I spoke to on the day (especially her smoothly executed escapes). Superman Kris was back too, with his indefatigable stamina, with several others returning for their second or third experience. There were plenty of new faces too: it's really cool that going to a GrappleThon has become a tradition for teams around the country! :D
Seymour 'Meerkatsu' Yang was back (see his write-up here), managing the triple support of donations (several hundred pounds from his art print auction alone), sponsorship and attendance. Also along from London was Mike Cowling and his team, which I think makes this their third visit. They've also now hosted a mini-GrappleThon back in the capital (about four months ago, part of the RollforROWW event), and will be hosting a full GrappleThon on the 9th April. For more info on that, I think you can get in touch via the Facebook event, here. There was plenty of local support too, with numerous Gracie Barra clubs in attendance (including Gloucester and Swindon, as well as Bristol), teams from Cornwall and Devon, Pedro Bessa, Sweatbox and of course students from Artemis BJJ. I believe Berry and Steve H from GB Bristol are the only two other people (apart from me) to attend all five of the GrappleThons I've organised. :)
I was pleased to see a considerable female turn-out for this GrappleThon, something that was notable last year too. I was hoping to encourage a few beginners into BJJ, tying in with the UKBJJA's #UnstoppableGirl campaign (who also wrote up a lovely press release for the 2016 GrappleThon), which did yield a couple of visitors. Natalia took the opportunity to give BJJ another go, while there was also a few women watching who said they would like to get on the mats in the future. It would be great to see a passion for BJJ kindled through the GrappleThon, so I'll be continuing to push that as part of upcoming GrappleThons too.
At the time of writing, we've raised almost £3,400 for One25, with Laura raising the most individually (and therefore winning the GIMONO gi). It's not too late to donate, plus you could even take part at the London leg of the One25 GrappleThon on the 9th April. I hope to see you there: I'm planning on heading along for the late shift. :)
Class #705
Artemis BJJ (MYGYM Bristol), Open Mat, Bristol, UK - 26-27/03/2016
I never spar all that much at GrappleThons, particularly compared to some of the incredible displays of stamina on display. At most it tends to be three or four hours, mostly spread across Sunday. My main concern is to plug gaps when there is nobody else able to get in a round, with the aim of going as light as I can. That means I'll pick partners who are either smaller or less experienced, so I don't use up much energy or risk getting injured. In other words, I'm pretty lazy. ;)
Still, I did get in one tougher roll, as Seymour was there to beat me up with his black belt skills. Having said that, it wasn't a high intensity spar: if Seymour hadn't been taking it very easy, he would have taken my feet home with him. His focus on lower body submissions meant for a very different roll to what I'm used to, putting me in positions I rarely see. In particular, I kept finding my leg stuck between his, with the lower part bent out and at risk of attack. My main defence was to triangle my legs, and/or grab his arm in order to pull it towards me. It's a good thing I'm having a private on leglock defence with my instructor in a few weeks, as clearly I need it. :)
23 March 2016
23/03/2016 - Teaching | Side Control | Reverse Scarf Hold to Mount
Teaching #484
Artemis BJJ (MYGYM Bristol), Can Sönmez, Bristol, UK - 23/03/2016
There are two main methods I use for transitioning from side control to mount. The first method involves reverse scarfhold, where you switch your hips into a scarf hold position to pry their elbow up (you have the option to switch back to a more orthodox side control to trap their arm too). As experienced grapplers will tend to keep their elbows tight, dragging your hip along the floor and into their elbow should enable you to scoop up their arm. However you manage it, getting the near elbow out of the way is key to this particular technique for transitioning to mount.
Having killed the near arm, switch one arm to grip their far arm, putting your other hand by their near hip. Shift your hips right back towards their head, as far as you can. Your elbow will either be in their far armpit or wrapped underneath their far arm for control. This position means you're also blocking their view with your entire body. Lean into them, using your body weight to help maintain control.
 That therefore stops them from seeing exactly what you're doing (note that when Saulo shows it on his DVD, he suggests you mess with them by slapping their legs, until you can pick your moment). When you've got up really high and are ready to go (at this point, they should almost be bridging to relieve the pressure), grab their knee to stop them snatching mount, then bring your leg across. Ideally, you'll pin their knee to the mat, squashing both their knees together.
If you're able to clamp their knees onto the near side, there is the possibility of inserting your foot behind their knees and switching through to mount. However, it generally isn't going to be easy to get them into that position, so I wouldn't rely on this, but still, if you can get it that's an easy route to mount. Second, you can grab your own foot and pull it across, or just squeeze it past your own arm, depending on your flexibility. This is useful when you have limited space, but personally I find it feels a little awkward, in that you might tangle yourself up in your own limbs.
Beginners will often try to simply swing their leg over, which is instinctive. However, while that can sometimes work, especially if you time it well, there are two main dangers. The first is that they will snatch half guard as your leg swings over, as it will normally be within range of their own legs. The second is even more dangerous. If they bridge into you midway through your swing, they can roll you onto your back and end up in your guard.
The safest option is to slide your knee across their belt line, then 'fishtail' (slapping the mat with the side of your lower leg) when your knee touches the mat. You can also grab their belt or cup their far hip to stop them shrimping midway through. I feel this is the best method, using steady pressure to get into place, rather than relying on explosive power, flexibility or luck.
_____________________
Teaching Notes: I may remove the fish tail element, as that causes problems. Perhaps instead, I could teach driving your knee backwards once you've got it across their belt line, pushing into their hip and thigh? I can't remember where I first saw that (though I'm sure it's in my blog somewhere), but that should be a lot easier than the fish tail. Next week I might go with the diagonal side control to mount transition on its own, though I've also been considering teaching the baseball bat choke at some point. But as we've moving into mount next month, I think sticking with the transition makes more sense.
Artemis BJJ (MYGYM Bristol), Can Sönmez, Bristol, UK - 23/03/2016
There are two main methods I use for transitioning from side control to mount. The first method involves reverse scarfhold, where you switch your hips into a scarf hold position to pry their elbow up (you have the option to switch back to a more orthodox side control to trap their arm too). As experienced grapplers will tend to keep their elbows tight, dragging your hip along the floor and into their elbow should enable you to scoop up their arm. However you manage it, getting the near elbow out of the way is key to this particular technique for transitioning to mount.
Having killed the near arm, switch one arm to grip their far arm, putting your other hand by their near hip. Shift your hips right back towards their head, as far as you can. Your elbow will either be in their far armpit or wrapped underneath their far arm for control. This position means you're also blocking their view with your entire body. Lean into them, using your body weight to help maintain control.
That therefore stops them from seeing exactly what you're doing (note that when Saulo shows it on his DVD, he suggests you mess with them by slapping their legs, until you can pick your moment). When you've got up really high and are ready to go (at this point, they should almost be bridging to relieve the pressure), grab their knee to stop them snatching mount, then bring your leg across. Ideally, you'll pin their knee to the mat, squashing both their knees together.If you're able to clamp their knees onto the near side, there is the possibility of inserting your foot behind their knees and switching through to mount. However, it generally isn't going to be easy to get them into that position, so I wouldn't rely on this, but still, if you can get it that's an easy route to mount. Second, you can grab your own foot and pull it across, or just squeeze it past your own arm, depending on your flexibility. This is useful when you have limited space, but personally I find it feels a little awkward, in that you might tangle yourself up in your own limbs.
Beginners will often try to simply swing their leg over, which is instinctive. However, while that can sometimes work, especially if you time it well, there are two main dangers. The first is that they will snatch half guard as your leg swings over, as it will normally be within range of their own legs. The second is even more dangerous. If they bridge into you midway through your swing, they can roll you onto your back and end up in your guard.
The safest option is to slide your knee across their belt line, then 'fishtail' (slapping the mat with the side of your lower leg) when your knee touches the mat. You can also grab their belt or cup their far hip to stop them shrimping midway through. I feel this is the best method, using steady pressure to get into place, rather than relying on explosive power, flexibility or luck.
_____________________
Teaching Notes: I may remove the fish tail element, as that causes problems. Perhaps instead, I could teach driving your knee backwards once you've got it across their belt line, pushing into their hip and thigh? I can't remember where I first saw that (though I'm sure it's in my blog somewhere), but that should be a lot easier than the fish tail. Next week I might go with the diagonal side control to mount transition on its own, though I've also been considering teaching the baseball bat choke at some point. But as we've moving into mount next month, I think sticking with the transition makes more sense.
23/03/2016 - Teaching | Women's Class | Half Guard Shoulder Pressure Pass
Teaching #483
Artemis BJJ (MYGYM Bristol), Can Sönmez, Bristol, UK - 23/03/2016
On top of half guard, your opening goal is to get them flat on the mat: there are passes you can do while they are on their side, but generally speaking it is much easier if their back is pinned to the floor. A simple method, drawing on the Ribeiro brothers, is to drive your free knee into their hip, block their head with your same side arm, then step your trapped leg up and away from you. Having generated some space, drive the trapped knee forwards as your return it to the mat, which should also help you drive your opponent to the mat as well.
 If you are able to get the cross-face and an underhook, there is now the option of generating lots of shoulder pressure. This is the simplest way I've learned to pass the half guard: both Saulo and his brother refer to this as the 'esgrima pass', but I call it the shoulder pressure pass in the interests of clarity. Cross-face their head (if you can't get the cross-face, you can also use your own head), so that they can't turn in that direction. Put your own head on the other side (or your arm, if you're already using your head to cross-face), locking their head into place: your shoulder and head work together to form a vice. Combined with your underhook, it should now become hard for them to move their upper body, because their head is stuck.
From here, come up on your feet so that all your weight is driving through your shoulder. Even if you're small, this should maximise your weight. I'm only 66kgs, but if I can get all of that weight against somebody's head, it becomes more significant. From there, bounce your trapped knee to wriggle it free (if you're having trouble and need additional leverage, rotate your free leg back to hook their leg with your instep). As soon as it is clear of their legs, twist in the direction of your cross-facing arm and put that knee on the mat. You can then kick their leg off your foot: some people prefer to kick the top leg, but I would generally go for the bottom leg. Turning your hips to the ceiling can also help if you're struggling to get that foot loose.
_____________________
Teaching Notes: I modified this a bit, trying out the lower version Saulo does on BJJ Library. In that, the shoulder is across the ribs rather than high by the head. The lower position also leaves a hand free to push on their knee, a handy addition that I think may make that variation superior to the one I usually teach. I'll try it again in the mixed class next time half guard month comes around.
Artemis BJJ (MYGYM Bristol), Can Sönmez, Bristol, UK - 23/03/2016
On top of half guard, your opening goal is to get them flat on the mat: there are passes you can do while they are on their side, but generally speaking it is much easier if their back is pinned to the floor. A simple method, drawing on the Ribeiro brothers, is to drive your free knee into their hip, block their head with your same side arm, then step your trapped leg up and away from you. Having generated some space, drive the trapped knee forwards as your return it to the mat, which should also help you drive your opponent to the mat as well.
If you are able to get the cross-face and an underhook, there is now the option of generating lots of shoulder pressure. This is the simplest way I've learned to pass the half guard: both Saulo and his brother refer to this as the 'esgrima pass', but I call it the shoulder pressure pass in the interests of clarity. Cross-face their head (if you can't get the cross-face, you can also use your own head), so that they can't turn in that direction. Put your own head on the other side (or your arm, if you're already using your head to cross-face), locking their head into place: your shoulder and head work together to form a vice. Combined with your underhook, it should now become hard for them to move their upper body, because their head is stuck. From here, come up on your feet so that all your weight is driving through your shoulder. Even if you're small, this should maximise your weight. I'm only 66kgs, but if I can get all of that weight against somebody's head, it becomes more significant. From there, bounce your trapped knee to wriggle it free (if you're having trouble and need additional leverage, rotate your free leg back to hook their leg with your instep). As soon as it is clear of their legs, twist in the direction of your cross-facing arm and put that knee on the mat. You can then kick their leg off your foot: some people prefer to kick the top leg, but I would generally go for the bottom leg. Turning your hips to the ceiling can also help if you're struggling to get that foot loose.
_____________________
Teaching Notes: I modified this a bit, trying out the lower version Saulo does on BJJ Library. In that, the shoulder is across the ribs rather than high by the head. The lower position also leaves a hand free to push on their knee, a handy addition that I think may make that variation superior to the one I usually teach. I'll try it again in the mixed class next time half guard month comes around.
22 March 2016
22/03/2016 - Open Mat
Class #704
Artemis BJJ (MYGYM Bristol), Open Mat, Bristol, UK - 22/03/2016
As I'm writing this up after the GrappleThon, I'm struggling to remember what we did. I think Simon and I went through a bit of x-guard, which is something I never use. I showed him an entry from spider guard that Tad once shared with me, but it's not a guard where I feel especially confident. However, it would be worth a look, as it doesn't rely on crazy grips and is mainly about the legs. Could be useful given my issues with doing something in open guard when I haven't got sitting guard?
21 March 2016
21/03/2016 - Teaching | Side Control | Gi Tail Choke
Teaching #482
Artemis BJJ (MYGYM Bristol), Can Sönmez, Bristol, UK - 21/03/2016
 I first learned this choke at RGA Bucks from Matt Burn, back in 2010. It's become one of my main offensive options from side control since then, though I still don't have a good name for it. Gi tail choke will do for now, until I can come up with something better. It starts from the classic side control position, with an arm under the head.
Open up your gi with your far hand. In sparring, you'll sometimes find that your gi is already open, or you may need to be sneaky about it (e.g., from reverse scarf hold, so they can't see what you're doing with your gi). Punch that gi tail inside their arm, then feed the gi lapel to your other hand (that should still be under their head). Once you have the gi tail in place, get a firm grip: you may want to keep on feeding it further to make your grip even more secure.
Cinch it tight to their neck (keep in mind that it is the gi material that will choke them, so keep your fist out of the way), straightening the arm you have under their head. Put your free hand on the floor by their same side hip, to stop them following you (always a good idea if you are transitioning to north-south). Keeping your upper body low, walk your legs around towards their head, as if you were going to north south. At the same time, move your head towards their near hip: they will probably tap before you get there, but if not, keep going until you can put your head next to their hip.
If the submission still isn't happening, make sure you're keeping your arm straight and pressed into their neck, so that your gi lapel digs into the other side of their neck. There's also the option of raising your hips and jamming your knee next to their head to increase leverage. I tend to avoid that, as I don't like to give them any space, but it's an option.
Should you have difficult straightening out your arm, try moving your head further down their body, past their leg. That should enable you to stretch out your body further, giving you the room to straighten your arm out fully. It may also help if you turn your shoulder and straighten out your arm before you turn: adjusting mid-turn can be tricky. Finally, keep in mind that your grip should mean that you can return to a tight, safe side control at any point, then either attempt the same submission or go for something else.
________________
Teaching Notes: I was reminded of John Will's great point about becoming a good observer, as teachers won't always show all the details they actually use to make a technique work, often because they don't realise they're doing it themselves. That happened to me tonight I think, as I've been turning my shoulder in before I begin to rotate for the submission, an adjustment that helped one student to get their arm in the right spot. Neither of us realised where he was going wrong until I demonstrated again on his training partner, at which point he saw what he needed. I'll be sure to remember that for next time: useful teaching pointer for me! ;)
Artemis BJJ (MYGYM Bristol), Can Sönmez, Bristol, UK - 21/03/2016
I first learned this choke at RGA Bucks from Matt Burn, back in 2010. It's become one of my main offensive options from side control since then, though I still don't have a good name for it. Gi tail choke will do for now, until I can come up with something better. It starts from the classic side control position, with an arm under the head. Open up your gi with your far hand. In sparring, you'll sometimes find that your gi is already open, or you may need to be sneaky about it (e.g., from reverse scarf hold, so they can't see what you're doing with your gi). Punch that gi tail inside their arm, then feed the gi lapel to your other hand (that should still be under their head). Once you have the gi tail in place, get a firm grip: you may want to keep on feeding it further to make your grip even more secure.
Cinch it tight to their neck (keep in mind that it is the gi material that will choke them, so keep your fist out of the way), straightening the arm you have under their head. Put your free hand on the floor by their same side hip, to stop them following you (always a good idea if you are transitioning to north-south). Keeping your upper body low, walk your legs around towards their head, as if you were going to north south. At the same time, move your head towards their near hip: they will probably tap before you get there, but if not, keep going until you can put your head next to their hip.
If the submission still isn't happening, make sure you're keeping your arm straight and pressed into their neck, so that your gi lapel digs into the other side of their neck. There's also the option of raising your hips and jamming your knee next to their head to increase leverage. I tend to avoid that, as I don't like to give them any space, but it's an option.
Should you have difficult straightening out your arm, try moving your head further down their body, past their leg. That should enable you to stretch out your body further, giving you the room to straighten your arm out fully. It may also help if you turn your shoulder and straighten out your arm before you turn: adjusting mid-turn can be tricky. Finally, keep in mind that your grip should mean that you can return to a tight, safe side control at any point, then either attempt the same submission or go for something else.
________________
Teaching Notes: I was reminded of John Will's great point about becoming a good observer, as teachers won't always show all the details they actually use to make a technique work, often because they don't realise they're doing it themselves. That happened to me tonight I think, as I've been turning my shoulder in before I begin to rotate for the submission, an adjustment that helped one student to get their arm in the right spot. Neither of us realised where he was going wrong until I demonstrated again on his training partner, at which point he saw what he needed. I'll be sure to remember that for next time: useful teaching pointer for me! ;)
20 March 2016
20/03/2016 - Open Mat
Class #703
Artemis BJJ (MYGYM Bristol), Open Mat, Bristol, UK - 20/03/2016
I spent the start of the open mat working out how to get the Chromecast working on my laptop, so I can use that for the GrappleThon this weekend. I could use my phone as usual, but as it will have to run through until 2pm the next day, I'd have to keep changing the battery and then the music shuffle play would restart. Laptop is the answer! Well, hopefully. :)
There was a good turnout tonight, again plenty of women (about half the class, IIRC). I had some good rolls with Milka, whose jiu jitsu is really coming along nicely now. Hopefully she'll be able to keep on making it to open mat, as she's going to become an excellent training partner in the not-too-distant future. :D
18 March 2016
18/03/2016 - Teaching | Side Control | North-South Kimura
Teaching #481
Artemis BJJ (MYGYM Bristol), Can Sönmez, Bristol, UK - 18/03/2016
 For the north south kimura, start in side control, controlling their far arm. This is made easier if they aren't careful and let you bump their arm up onto your shoulder. Often they'll put it there themselves, attempting to reach your head, enabling you to trap their arm by your shoulder. Another possibility is that they turn and try to get an underhook.
Whether they put it there or you do, the next step is to wrap your arm over theirs, aiming to get just under their elbow to kill mobility in the limb. Ideally, also pull them up by that arm, so they're rolled onto their side. To lock it in place, grab your own collar, or just somewhere on your gi if you can't reach far enough. You'll also want to use you head, clamping your skull against their forearm. Braulio advises following their arm with your head: e.g., if they try to fling it down to the mat or something like that. Don't let them work their arm past your head.
You're also going to move round to north-south, so again you need to block their legs from running after you by putting a hand on the mat, near their bum (although it should be a bit harder for them to turn if you've locked up that arm). As you move around, you want to jam your knee into the armpit of their free arm, swivelling your lower leg under that arm as you move around. That makes it harder for them to escape. If you can't manage that, slide your knee over their free arm once you've got to north south. It is useful to maintain some kind of control on that free arm, as otherwise they can use it to try and create some space to escape.
You essentially end up sitting on their head, so in drilling, be aware that you don't want to squish your partner. You can take a bit of the weight off by transferring it to your knees: obviously in competition, that's less of a concern. As you sit up, make sure their elbow is glued to your chest.
The next important step is to establish a figure four on their trapped arm, which can be easier said than done. One simple method Kev showed me is to put your free hand in place, ready to grab their wrist. Next, turn your head away from their arm: this will push your shoulder forwards, which will then also knock their arm forwards, putting the wrist right into your waiting hand. It's then simple to complete the figure four grip.
To finish the kimura, simply turn back in the other direction, pushing their wrist towards the side their elbow is pointing . Alternatively, you can also bring the elbow of your non-clamping arm to their trapped arm side. Turn your body so you're facing their head, then apply the kimura from that lower position.
If you make a mistake while looking to apply the kimura from that upright position, or they simply defend well, you might find that they are able to grab their own belt or gi. This will make it tough to complete the submission. You can try pulling in the direction their knuckles are pointing, or Roy Dean's option of using rhythm to break that grip. Push their arm towards them twice, as if you are really trying to break their grip, then yank hard in the other direction (aiming for the direction in which their fingers are weakest). Lovato Jr suggests adjusting your grip so that you're holding the meat of their hand rather than their wrist. He then does two quick jerks to yank their hand free.
Should none of that work, you can instead switch to an armbar. Bring your knee up on their trapped arm side. This will enable you to put your whole body into it when you turn towards their other side, which should break their grip. Make sure you keep that figure four grip, as it is about to prove useful. If possible, you also want to try and slip your foot into the armpit of their free arm, which should help prevent their escape attempt.
Pinch your knees together to control their arm, in what is sometimes called a 'Japanese armbar' position (I'm not sure why: something from Japan, I guess? Or maybe Pancrase? Leave a comment if you know). You don't have both your legs over their body, which means that the hitchhiker escape is a possibility. It's called that because they lead with their thumb pointing the way out, turning their body and walking around.
However, because you have that figure-four grip, they can't use it anymore. If they try to turn away, you can just apply the kimura. In order to relieve the pressure, they'll have to turn back. You can then drop to the mat, switching your grip to finish the armbar as normal. Another option is to grab their leg, wrapping underneath it ideally. That will prevent them turning, because they need to swivel that leg down: they can't if your arm is in the way.
_____________________
Teaching Notes: I'm wondering is if it be worth showing this with their other arm on your shoulder, so you don't have to switch arms? As usual, it's also important to emphasise keeping their elbow tight to your chest and not leaning forward, as too far of a lean and they can grab their belt/gi. You need to be upright.
I added in the armbar from knee on belly and the north south hopping armbar as drills, which seemed to work ok. I could perhaps just stick with the hop, mechanically that feels a little simpler? Also, it doesn't rely as much on the bottom person making a mistake, especially as most experienced people will avoid put their hand on the knee underneath knee on belly.
Artemis BJJ (MYGYM Bristol), Can Sönmez, Bristol, UK - 18/03/2016
For the north south kimura, start in side control, controlling their far arm. This is made easier if they aren't careful and let you bump their arm up onto your shoulder. Often they'll put it there themselves, attempting to reach your head, enabling you to trap their arm by your shoulder. Another possibility is that they turn and try to get an underhook.Whether they put it there or you do, the next step is to wrap your arm over theirs, aiming to get just under their elbow to kill mobility in the limb. Ideally, also pull them up by that arm, so they're rolled onto their side. To lock it in place, grab your own collar, or just somewhere on your gi if you can't reach far enough. You'll also want to use you head, clamping your skull against their forearm. Braulio advises following their arm with your head: e.g., if they try to fling it down to the mat or something like that. Don't let them work their arm past your head.
You're also going to move round to north-south, so again you need to block their legs from running after you by putting a hand on the mat, near their bum (although it should be a bit harder for them to turn if you've locked up that arm). As you move around, you want to jam your knee into the armpit of their free arm, swivelling your lower leg under that arm as you move around. That makes it harder for them to escape. If you can't manage that, slide your knee over their free arm once you've got to north south. It is useful to maintain some kind of control on that free arm, as otherwise they can use it to try and create some space to escape.
You essentially end up sitting on their head, so in drilling, be aware that you don't want to squish your partner. You can take a bit of the weight off by transferring it to your knees: obviously in competition, that's less of a concern. As you sit up, make sure their elbow is glued to your chest.
The next important step is to establish a figure four on their trapped arm, which can be easier said than done. One simple method Kev showed me is to put your free hand in place, ready to grab their wrist. Next, turn your head away from their arm: this will push your shoulder forwards, which will then also knock their arm forwards, putting the wrist right into your waiting hand. It's then simple to complete the figure four grip.
To finish the kimura, simply turn back in the other direction, pushing their wrist towards the side their elbow is pointing . Alternatively, you can also bring the elbow of your non-clamping arm to their trapped arm side. Turn your body so you're facing their head, then apply the kimura from that lower position.
If you make a mistake while looking to apply the kimura from that upright position, or they simply defend well, you might find that they are able to grab their own belt or gi. This will make it tough to complete the submission. You can try pulling in the direction their knuckles are pointing, or Roy Dean's option of using rhythm to break that grip. Push their arm towards them twice, as if you are really trying to break their grip, then yank hard in the other direction (aiming for the direction in which their fingers are weakest). Lovato Jr suggests adjusting your grip so that you're holding the meat of their hand rather than their wrist. He then does two quick jerks to yank their hand free.
Should none of that work, you can instead switch to an armbar. Bring your knee up on their trapped arm side. This will enable you to put your whole body into it when you turn towards their other side, which should break their grip. Make sure you keep that figure four grip, as it is about to prove useful. If possible, you also want to try and slip your foot into the armpit of their free arm, which should help prevent their escape attempt.
Pinch your knees together to control their arm, in what is sometimes called a 'Japanese armbar' position (I'm not sure why: something from Japan, I guess? Or maybe Pancrase? Leave a comment if you know). You don't have both your legs over their body, which means that the hitchhiker escape is a possibility. It's called that because they lead with their thumb pointing the way out, turning their body and walking around.
However, because you have that figure-four grip, they can't use it anymore. If they try to turn away, you can just apply the kimura. In order to relieve the pressure, they'll have to turn back. You can then drop to the mat, switching your grip to finish the armbar as normal. Another option is to grab their leg, wrapping underneath it ideally. That will prevent them turning, because they need to swivel that leg down: they can't if your arm is in the way.
_____________________
Teaching Notes: I'm wondering is if it be worth showing this with their other arm on your shoulder, so you don't have to switch arms? As usual, it's also important to emphasise keeping their elbow tight to your chest and not leaning forward, as too far of a lean and they can grab their belt/gi. You need to be upright.
I added in the armbar from knee on belly and the north south hopping armbar as drills, which seemed to work ok. I could perhaps just stick with the hop, mechanically that feels a little simpler? Also, it doesn't rely as much on the bottom person making a mistake, especially as most experienced people will avoid put their hand on the knee underneath knee on belly.
16 March 2016
16/03/2016 - Teaching | Side Control | Breadcutter Choke
Teaching #480
Artemis BJJ (MYGYM Bristol), Can Sönmez, Bristol, UK - 16/03/2016
 The breadcutter choke can be set up in various ways. The way I first learned was moving towards north-south from side control. They will then often reach past your hip, which leaves a space for you to reach under their armpit and clamp it to your side. That means their arm is stuck between your side and your arm. Move back to side control, then with the hand of that clamping arm, grab behind their neck, gripping in the middle of the collar. Cinch that in.
You can also move into north-south, secure that for a moment, then reach back to get the collar grip. Either way, when you have that grip, walk back into side control. I like to use Xande's version to finish, as it feels a bit 'cleaner' than some of the others. Rather than turning their head to press into the side of the neck, he grips across to the far collar while they are still facing up. The hand needs to be far enough up that it doesn't cause the arm to squish the windpipe, but low enough to keep the gi tight. Drop your elbow, close to where your first hand is gripping. You then pry their head back with your elbow for the submission.
Another handy aspect of this technique is that it will work when your opponent does the classic white belt death grip over the back defence. As both their arm are up over your back, that leave your free to establish both your grips, as they aren't defending their neck. With the arm that goes over the neck, keep your elbow tight to your side. Xande starts from a position where both his knees are in. When he sprawls back on the leg nearest their legs, it enables his body to smoothly turn with his elbow still by his side, settling right into the choke.
In Saulo's version, as you move back around to side control, move your free arm back towards you, then use that to turn their head away from you. This feels counter-intuitive, as you'd expect to drag that arm back and turn their head towards you. However, you want to expose the near side of their neck. So, bring your arm back, then drive it over their jawline, turning their head away. Grip their far collar with your free hand (this might require balancing on their chest, turned towards their head, which should also help keep them pinned to the mat), then put your forearm into the exposed side of their neck.
To finish, you need to create some pressure into their neck, in order to close off the artery. Turn towards their legs, in a sort of reverse scarf hold position, then use that base from your legs to lower yourself gradually into their neck, keeping your initial gi grip tight. Be careful, as this can come on quickly and it isn't very comfortable.
_____________________
Teaching Notes: I've been trying this choke a lot more often in sparring, but it still needs some refinement. Teaching definitely helps with that. Next time, I want to note the option of leaning towards their head to add in some extra pressure onto their neck if you need it. While I prefer Xande's gentler version, it is good to have a backup for when that doesn't work (and I guess the leaning version isn't overly mean, as long as you do it with good balance and control).
Artemis BJJ (MYGYM Bristol), Can Sönmez, Bristol, UK - 16/03/2016
The breadcutter choke can be set up in various ways. The way I first learned was moving towards north-south from side control. They will then often reach past your hip, which leaves a space for you to reach under their armpit and clamp it to your side. That means their arm is stuck between your side and your arm. Move back to side control, then with the hand of that clamping arm, grab behind their neck, gripping in the middle of the collar. Cinch that in. You can also move into north-south, secure that for a moment, then reach back to get the collar grip. Either way, when you have that grip, walk back into side control. I like to use Xande's version to finish, as it feels a bit 'cleaner' than some of the others. Rather than turning their head to press into the side of the neck, he grips across to the far collar while they are still facing up. The hand needs to be far enough up that it doesn't cause the arm to squish the windpipe, but low enough to keep the gi tight. Drop your elbow, close to where your first hand is gripping. You then pry their head back with your elbow for the submission.
Another handy aspect of this technique is that it will work when your opponent does the classic white belt death grip over the back defence. As both their arm are up over your back, that leave your free to establish both your grips, as they aren't defending their neck. With the arm that goes over the neck, keep your elbow tight to your side. Xande starts from a position where both his knees are in. When he sprawls back on the leg nearest their legs, it enables his body to smoothly turn with his elbow still by his side, settling right into the choke.
In Saulo's version, as you move back around to side control, move your free arm back towards you, then use that to turn their head away from you. This feels counter-intuitive, as you'd expect to drag that arm back and turn their head towards you. However, you want to expose the near side of their neck. So, bring your arm back, then drive it over their jawline, turning their head away. Grip their far collar with your free hand (this might require balancing on their chest, turned towards their head, which should also help keep them pinned to the mat), then put your forearm into the exposed side of their neck.
To finish, you need to create some pressure into their neck, in order to close off the artery. Turn towards their legs, in a sort of reverse scarf hold position, then use that base from your legs to lower yourself gradually into their neck, keeping your initial gi grip tight. Be careful, as this can come on quickly and it isn't very comfortable.
_____________________
Teaching Notes: I've been trying this choke a lot more often in sparring, but it still needs some refinement. Teaching definitely helps with that. Next time, I want to note the option of leaning towards their head to add in some extra pressure onto their neck if you need it. While I prefer Xande's gentler version, it is good to have a backup for when that doesn't work (and I guess the leaning version isn't overly mean, as long as you do it with good balance and control).
16/03/2016 - Teaching | Women's Class | Maintaining Side Control
Teaching #479
Artemis BJJ (MYGYM Bristol), Can Sönmez, Bristol, UK - 16/03/2016
 As ever, I kicked off with the conceptual framework John described to me in Texas: the primary control points are the hips and the triangle of shoulders and head, secondary control is inside the knees and elbows, then finally tertiary control relates to the wrists and ankles. John goes into more detail over on this thread. I think it's helpful to have that framework at the start, as then the students can hopefully see how that principle filters through everything we'll be training today.
A particularly effective method of control is applying a cross face. If you're not familiar with the term, that means bringing your near side arm under their head: I like to reach right to their far armpit and anchor my arm there, either by cupping, or by getting a hold of the gi material. From that position, you can then drive your shoulder and/or arm into the side of their head or neck, aiming to get their head to turn away from you and/or generate some choking pressure to distract them.
If they can't turn their head back towards you due to the shoulder pressure, it will make it much harder for them to create space and escape. "The body follows the head" or "where the head goes, the body follows" is an old adage and a true one. This is what SBG call the 'shoulder of justice.' If you shift your shoulder from their face to their neck, that choking pressure can also open up opportunities to switch to mount or consider initiating a submission attempt. However, it does mean they can probably turn their head again, which improves their escape opportunities.
Next, it is a good idea to deal with their far arm. Reach under that far elbow with your arm, coming under the armpit. You have a couple of options here. Option one is linking your hands together with a gable grip and sucking them in towards you, providing a very tight side control. This is how Tran showed it to me several years ago. Option two is gripping around their shoulder, to bring their shoulder off the mat: this is something Dónal likes to do, which isn't surprising as I think I first saw that on a Braulio video. You can also use the elbow of your far arm to squeeze into their far hip. This latter option makes more sense if you're already grabbing by their armpit with your near arm. You want to keep control over their far arm for two reasons: first, they can use it to defend, by getting it into your neck. Second, there are a number of attacks you can do from here.
I also wanted to emphasise chest position. Picture an imaginary line between the middle of their chest and also between yours. You want to bisect those lines: don't be too far over them, or they can easily roll you (if they DO try and roll you and it's working, put your far arm or your forehead out for base). Too far back, and it's easier for them to slip out and escape. Stay low, dropping your hips: don't leave them any space.
 Moving on to the legs, there are a bunch of different things you can do. I used to prefer to bring both knees in tight, but I later started sprawling the leg nearer the head backwards, which enables me to bring my hips much lower. This is key: you must keep your hips low in side control. If your knees are in tight, widen them if your hips are still high.
The lower the hips, the more weight on top of them, which therefore gives you better control. However, if you have both legs sprawled back, there is a chance they might be able to bring their knee inside: you need to block it somehow, which would commonly be with the hip nearest their legs, your hand or your knee. Play around and see which position you like, and also be ready to switch depending on your partner's movement. Finally, if you're sprawling your legs back, keep your knees off the ground and stay on your toes. This helps with mobility and driving forward.
________________
Teaching Notes: I added in some north south drills, but otherwise this is straightforward. Main thing to mention from tonight was the awesome turnout of women. We had a decent number in the women's class, then a total of six in the mixed class. Brilliant! :D
Artemis BJJ (MYGYM Bristol), Can Sönmez, Bristol, UK - 16/03/2016
As ever, I kicked off with the conceptual framework John described to me in Texas: the primary control points are the hips and the triangle of shoulders and head, secondary control is inside the knees and elbows, then finally tertiary control relates to the wrists and ankles. John goes into more detail over on this thread. I think it's helpful to have that framework at the start, as then the students can hopefully see how that principle filters through everything we'll be training today.A particularly effective method of control is applying a cross face. If you're not familiar with the term, that means bringing your near side arm under their head: I like to reach right to their far armpit and anchor my arm there, either by cupping, or by getting a hold of the gi material. From that position, you can then drive your shoulder and/or arm into the side of their head or neck, aiming to get their head to turn away from you and/or generate some choking pressure to distract them.
If they can't turn their head back towards you due to the shoulder pressure, it will make it much harder for them to create space and escape. "The body follows the head" or "where the head goes, the body follows" is an old adage and a true one. This is what SBG call the 'shoulder of justice.' If you shift your shoulder from their face to their neck, that choking pressure can also open up opportunities to switch to mount or consider initiating a submission attempt. However, it does mean they can probably turn their head again, which improves their escape opportunities.
Next, it is a good idea to deal with their far arm. Reach under that far elbow with your arm, coming under the armpit. You have a couple of options here. Option one is linking your hands together with a gable grip and sucking them in towards you, providing a very tight side control. This is how Tran showed it to me several years ago. Option two is gripping around their shoulder, to bring their shoulder off the mat: this is something Dónal likes to do, which isn't surprising as I think I first saw that on a Braulio video. You can also use the elbow of your far arm to squeeze into their far hip. This latter option makes more sense if you're already grabbing by their armpit with your near arm. You want to keep control over their far arm for two reasons: first, they can use it to defend, by getting it into your neck. Second, there are a number of attacks you can do from here.
I also wanted to emphasise chest position. Picture an imaginary line between the middle of their chest and also between yours. You want to bisect those lines: don't be too far over them, or they can easily roll you (if they DO try and roll you and it's working, put your far arm or your forehead out for base). Too far back, and it's easier for them to slip out and escape. Stay low, dropping your hips: don't leave them any space.
 Moving on to the legs, there are a bunch of different things you can do. I used to prefer to bring both knees in tight, but I later started sprawling the leg nearer the head backwards, which enables me to bring my hips much lower. This is key: you must keep your hips low in side control. If your knees are in tight, widen them if your hips are still high.
 The lower the hips, the more weight on top of them, which therefore gives you better control. However, if you have both legs sprawled back, there is a chance they might be able to bring their knee inside: you need to block it somehow, which would commonly be with the hip nearest their legs, your hand or your knee. Play around and see which position you like, and also be ready to switch depending on your partner's movement. Finally, if you're sprawling your legs back, keep your knees off the ground and stay on your toes. This helps with mobility and driving forward.
________________
Teaching Notes: I added in some north south drills, but otherwise this is straightforward. Main thing to mention from tonight was the awesome turnout of women. We had a decent number in the women's class, then a total of six in the mixed class. Brilliant! :D
15 March 2016
15/03/2016 - Open Mat | Kaatsu with MoveStrong
Class #702
Artemis BJJ (MYGYM Bristol), Open Mat, Bristol, UK - 15/03/2016
Today I had a chance to try out kaatsu after the kettlebells class with David. It's a method from Japan that apparently works by restricting blood flow, making a light workout way more productive. I don't fully understand how it works, but as David is currently do free trials, thought I'd give it a go. He talks about it more in a post here.
In excellent news, David is going to be offering free kettlebell and kaatsu workshops at the GrappleThon, on Sunday morning. Along with the massages from Lisa, it's shaping up to be a great day even if you're aren't mainly there for BJJ! Multiple activities. :D
In terms of drilling today, Simon wanted to have a go at doing an armbar as they try to escape your body triangle. I think that could work if you're sneaky about it. When he did it the first time, I escaped, but it was on quicker than I expected. If your partner wasn't expecting it at all, I reckon you could catch them with it, especially if you manage to distract them by really selling the body triangle part, pretending you're focused on maintaining that as they try to escape.
14 March 2016
14/03/2016 - Teaching | Side Control | Transition to North/South
Teaching #478
Artemis BJJ (MYGYM Bristol), Can Sönmez, Bristol, UK - 14/03/2016
 When moving around to north-south from standard side control, start by shifting your grip. You'll need to place one arm by their near hip. A useful tip from Braulio is to anchor your hand flat on the mat by their legs, elbow near their bum. If you instead grab their gi or their trousers, they will be able to follow you with their legs as you turn. If you put your hand in the way, that acts as a barrier, meaning you can scoot around but they can't scamper after you. Your other hand will normally wrap under their far shoulder, especially if you're looking for a kimura.
As always with top positions, you must make sure you are maximising the weight you're driving into them. Stay on your toes as you walk around, also establishing solid grips with your hands. Press your chest down to turn their head to one side: that is a good general rule of thumb from top position, as if you can turn their head to one side, it is tough for them to turn their body in the other direction.
There are numerous ways you can grip in this position, as ever. A common option is to basically flop your upper body onto their head, bringing your knees in. My personal preference is to move off to one side of the head, driving my weight onto their shoulder, my head low and pressing down, sprawling back with my legs.
You can also experiment with various grips. The most basic is probably grabbing under their shoulders and reaching for their belt, then pulling them in towards you. You could also try putting your elbows into their armpits, or maybe wrap up an arm, perhaps sliding your arm under the head. Another common approach is to have one arm over their arm, while the elbow of your other arm digs into their armpit.
 Generally you want to keep your hips low, like in side control, but there are variations where you raise your hips, driving your weight through your shoulders. As Jason Scully over on Grapplers Guide mentioned, if they try that escape where they wriggle out and fling their legs over to take your back, raising your hips can be useful. You can then drive your forehead into their chest to stop them completing the escape.
The best place to learn about maintaining the north-south probably isn't BJJ: its parent art judo is much better at pins. In judo, the orthodox north-south is called 'kami shiho gatame', with lots of variations. For example, the above picture shows three options mentioned in an old instructional book from 1952, Higher Judo: Groundwork, by Dr Moshé Feldenkrais (not only a good judoka, but an engineer, physicist and founder of the eponymous 'Feldenkrais Method').
_____________________
Teaching Notes: I seem to have forgotten to put this one up after Amsterdam, so I'm adding this a month later. Which also means I really can't remember if there was anything to emphasise after this class. I do remember using the north south transition as a drill in the next class. It's probably worth adding some kind of very simple submission in here, or something to beef it up. But meh, I probably had something to say along those lines: this is why I should update my training summary spreadsheet more often, as it highlights when I forget a lesson. ;)
12th-13th March, Haarlem & Amsterdam
Transport
I had intended to go to the Netherlands for the major Bosch exhibition, but cleverly didn't think to book my gallery ticket in advance: by the time I got round to it, they had sold out for the dates I was there. I therefore decided to take the opportunity to pop over to Haarlem instead and check out the Frans Hal's museum, following the plan I made eight years ago when I was last in Amsterdam.
From Schipol, you can get a train to Amsterdam Sloterdijk, where you change for Haarlem. There are plenty of ticket machines taking card and cash (Maestro incurs no extra charge, but Visa and MasterCard means and extra €0.50). You also pay an extra €1 for the single use chip card, as they clearly want you to buy Amsterdam's equivalent to the Oystercard. With that single-use option, I paid €5.70 on my Visa for a single to Amsterdam Central, then a further €8.50 for a return to Haarlem from Amsterdam Sloterdijk.
I didn't see any trains for my destination, then noticed signs in Dutch with both 'Haarlem' and a picture of a bus. The rail replacement buses can be found by going out of the station, walk all the way past the end of the building, until you see some stairs on your left. Go down those and the buses are to the right. By train, it should be a 19 minute journey from Amsterdam Centraal to Haarlem. By bus from Amsterdam Sloterdijk, we reached Haarlem' main station in 21 minutes.
Frans Hals Museum
After mentally banging my head against the wall when I realised Bosch had sold out, Frans Hals was the first alternative that sprung to mind. I was worried it would be too small, leaving me to wallow in internal recriminations about wasting a plane ticket. The opening times (11:00-17:00) increased that worry.
However, after reading some glowing TripAdvisor reviews and confirming the gallery had some Judith Leyster, I made my decision. It was the right one. After a 30 minute walk, I got there just after they opened, leaving just as the doors were being closed. There is more than enough on display to keep your interest for the full 6 hours (they only open 12:00-17:00 on Sunday, so go earlier in the week).
The €12.50 price includes a good audio guide, which you can alternatively download as an app. It requires a connection, for which the museum has free WiFi: the question therefore comes down to your phone battery. As the audio guide is free, you might as well use that. Also, bring a €1 coin for the lockers: the mechanism returns it after unlocking.
Along with the usual audioguide process of keying in numbers for relevant paintings, you can also learn more about the history of the building (501 to about 516). Several of the rooms are covered, indicated by the number appearing on a door frame. The story of the museum's history intertwines with a number of the paintings, as there are several group portraits of hospital and orphanage regents. The building has connections to both.
When I was there, the museum was running an exhibition right up my street, all about focusing in on detail. The title - 'I Spy With My Little Eye' - made it sound like a dumbed down children's activity, but fortunately it was nothing of the sort, crammed with cerebral content. All around the gallery, there were snippets of text by a respected art critic (Wieteke van Zeil) highlighting unusual poses, paraphernalia, people and the like. That from a few sentences to a full page discussion.
The exhibition goes into particular depth on a work by Jan van Scorel, 'The Baptism of Christ', with multiple versions, short videos on the underdrawing, comparative works and an interview with the restorers describing what they uncovered. For example, several figures had been overpainted in the past, some of which could be retrieved, but others had to remain hidden. That same introductory piece quoted a statistic that art gallery visitors spend a mere 9 seconds on average looking at a painting. I'd be interested to know the source, as 9 seconds sounds quite low, but I guess it is an average.
There is an introductory video for Frans Hals too at the entrance, presented across an impressive 67 screens, but it's all in Dutch. He unsurprisingly takes a starring role in his eponymous museum, but he isn't the overwhelming presence you might expect. Hals is only in a handful of rooms, most importantly room 14. This is easily the most engaging display in the whole museum, featuring lots of huge group portraits of civic guards by Hals.
What caught my attention about these Hals masterpieces was the 'spark of life' present in the expressions and body language of his figures. That's a quality I've long found important in art, as well as poetry and indeed part of the reason I enjoy BJJ. I got very pretentious about it a few years ago, when a university friend who is part of the creative writing department asked me to teach a seminar combining martial arts and poetry.
In BJJ, resistance is an important part of what distinguishes it from many other martial arts, as well as what makes it fun. Without that key element of resistance, BJJ would lose much of its appeal: the challenge would be gone, the progression wouldn't exist and the techniques would ossify. Poetry needs it too, in order to make the words jump off the page and grab you (they need technical skill too, I should add: the lack of formal craft is what puts me off 99% of poetry, and my snobbery increased the longer I studied poetry at uni).
In art, that spark of life is in painters like Hals. Frank Frazetta is another good example. The faces of their subjects are alive, for want of a better word. It isn't that they're hyper-realistic, it's something in the expression, the angle of their arm, the twist of their mouth. There are lots of paintings where it doesn't look as if the person depicted has anything behind their eyes. I've never seen that happen in a Hals portrait.
Room 14 also has some civic guard portraits by Cornelis Cornelisz van Haarlem (at least, that's how it was written on the info boards, but the audioguide just used his forename once). Van Haarlem pops up quite often throughout the museum: my favourite was the satisfyingly ambiguous (if that isn't an oxymoron) 'Monk touching a nun'. It is the motivation behind that touch which results in the ambiguity. At first glance, it's another example of a pervy monk, fondling a nun in an example of the debauched church. However, when you look at their expressions, neither of them seem in the least interested in anything carnal. That's where a second interpretation comes in. According to --INSERT LEGEND--, a nun was accused of being pregnant. To test her guilt, a monk squeezed her breast to see if she lactated. Indeed she did, but miraculously it was wine rather than milk, proving her innocence. That means the wine next to the ecclesiastical pair has a double meaning too, either the proof of this interpretation, or merely the accoutrements of the disresolute couple getting their sin on.
Along with Cornelis, there are numerous other major Haarlem artists. Many of them I either hadn't heard of before, like Johannes Verspronck, or did know but only very little, like Maarten van Heemskeerck. There were also two I had certainly heard of before. The aforementioned Judith Leyster was a rare example of a successful pre-20th century female painter. The other is Pieter Saenredam, famous for his austere church interiors. The architectural precision excites the same part of my brain that takes so much pleasure in producing spreadsheets, so he feels like a very Protestant artist.
Rijksmuseum
My favourite art is Flemish and Dutch. That automatically puts the Rijksmuseum near the top of my 'best art galleries' list, as it has a great collection of both. You can get your €17.50 ticket online if you want to avoid the queues, though as I arrived just before opening at 9am (hours are 09:00-17:00 every day), they weren't long anyway. Be aware that the entrance is in the corridor where the bikes cycle through, where there are two revolving doors on the right.
The lockers here do not return coins, unlike the Frans Hals Museum, but they take a €0.50 coin, so aren't expensive. Keep hold of your tickets. Mine were checked twice, first in the entrance portico (it had a big banner with 'catwalk' on it, so I thought it was a separate exhibition at first), then again by the archway past the lockers, leading into the medieval section.
The audio guide is superb. To call it an audio guide is too limited, as it fully lives up to being sold as a multimedia guide. There are frequent and useful videos (showing underdrawings, zooming in on details, even demonstrating how the figures depicted in sculpture might move), along with detailed visual, audio and text directions for the numerous 90 and 45 minute tours you can select. There is also the usual type in a number and get more info option, which is split into up to three sections. First, a rundown of the painting/object, then a briefer examination of a detail, and finally a talk by an expert (at least most of the time, there was at least one example of a visitor's thoughts, but she had an interesting perspective to share on 'The Jewish Bride'). The guide comes as a free app for your phone (WiFi at the Rijksmuseum is fast and free), or you can pay €5 for a handset if you want to conserve battery.
The 1661 Rembrandt self portrait, with its virtuoso turban that achieves such perfection in the minimum of brush strokes, is still the picture I most associate with him. It was the cover of some old magazine my father had years ago, which served as my introduction to art when I was around 11 or 12. It was one of those where you had a big binder and got a new magazine in the series each week or month. Masters of Art, something like that.
I forget how brilliant Vermeer is sometimes: yesterday reminded me. It isn't just his unmatched handling of light, but also the powerful narrative ambiguity. The glances exchanged in 'The Love Letter' are as evocative as a Hals or Jan Steen, while at the same time subtle and understated. Speaking of Steen, I tend to think his 'The Merry Family' isn't as stiffly moralising as some critics insist. The expressions on their faces aren't those of leering caricatures IMO, but a genuinely happy group who enjoy each other's company. Multiple messages, which Steen does a lot.
Gerard ter Borch's 'Gallant Conversation' is less prominently displayed than the others but it is a must see. Even more than usual, you need to be in front of the actual painting. Ter Borch was renowned for his magnificent rendering of satin. Unlike most paintings, it still looks real even if you put your face right up close to the paint. That's what I call craft, something I don't see in most work past about 1950 (massive generalisation, but meh, I still haven't found a place in my heart for modern art ;D).
I was pleased to take another look at Avercamp, one of my favourite artists, with lots of extra information. In most (all?) of the rooms at the Rijksmuseum, there are large cardboard sheets stacked in racks. These have one or more of the paintings in that room printed on both sides, festooned with captions. For painters that love their intricate detail, like Avercamp, this is an excellent resource. I was especially pleased to see a short book on Avercamp in the excellent Rijksmuseum shop: I've been looking for something to read on him for a while.
I then moved on past my comfort zone of 1450-1750. That period covers off the vast majority of what interests me about the Rijksmuseum, but as if to admonish me, right as I was quickly walking through the 19th century section, Goya popped up. He's one of the exceptions in my taste, as I love his work, despite his dates being 1746-1828. I also quite like the late 19th century, particularly the Pre Raphaelite Brotherhood and the Symbolists. There's a representative of the latter group at the Rijksmuseum, Lawrence Alma-Tadema (or at least, he has been connected to that group).
On an entirely different topic, there was some fascinating stuff about Dutch colonial history (e.g., in Surinam), plus the Dutch trading post on an artificial island (originally occupied by the Portuguese, until they were turfed out for proselytising) in pre-1853 Japan, a unique position for non-Japanese at the time. If you've read 'Samurai William', or you're a fan of Samurai Champloo, you'll be familiar with Dejima. In the museum, it's transliterated as Deshima.
Finally, I wanted to share an awesome depiction of my favourite Hindu goddess, Durga, housed in the Rijksmuseum's Asian Pavilion. Her name translates as 'invincible', because she's the toughest fighter in the whole Hindu pantheon, as far as I'm aware. The rest of the deities couldn't handle the buffalo demon Mahishasura, so sent Durga to do the job. He was pretty tough himself - she had to slay him multiple times because he kept changing form -but he was no match for Durga. Apologies in advance to any Hindus if I've garbled that reading. ;)
Before I left, there was a suitably small exhibition on Vermeer's famous 'Little Street' downstairs. Researchers have recently been able to pin down exactly which street he painted (it turns out it was right by a relative's house), so this room shows the painting alongside various maps and examples of similar painting (in Vermeer's case, the artist who comes closest to his work is probably Pieter de Hooch).
There was still time after the museum closed for a quick visit to something else. Typing 'museum' into my phone map revealed that Amsterdam had a Cheese Museum: I couldn't resist. It's basically a shop, but they have a little display downstairs (no cost). Best of all, loads of free cheese samples! Dutch cheese is a bit mild for my taste (my favourites tend to be British, especially stilton and extra mature cheddar), but they've got some interesting flavours at the AMC. I had hoped to pop down to a BJJ club in Amsterdam too, as I know there's a good Globetrotter-friendly school there, but wasn't able to make it this trip. Next time! :)
On my way back to the airport, it's worth noting that you should be careful which train you catch to Schipol: some apparently need a special supplement. It says it clearly on the train as you enter, plus they also announce it onboard. I'm not sure exactly what this supplement entails, as nobody has ever checked my tickets on a Dutch train. Also, with the single use tickets, it doesn't particularly matter if you walk through a turnstile without touching in and out: they never seem to be locked. Nevertheless, to be safe, I'd avoid getting on trains that need a supplement, stick to the normal ones. They're quite frequent to Schipol anyway.
11 March 2016
11/03/2016 - Teaching | Side Control | Knee On Belly Armbar
Teaching #477
Artemis BJJ (MYGYM Bristol), Can Sönmez, Bristol, UK - 11/03/2016
To transition from side control to knee-on-belly, you first need to have enough space. If you want to clear their near elbow, u7e your knee (the leg furthest from their head), then switch your hips back to trap their arm. Grab the collar behind their head with one hand, with the other be pressed into their far hip, both hands attempting to push firmly towards the floor.
Even if you can't clear their elbow, you can still transition to knee-on-chest. Bring the knee nearest their face right up to their head. Grip their collar and hip as before, and again push up and bring your knee to their chest. Though they have an elbow in the way, you will simply shove past it, bringing your knee outwards in a small arc as you do so.
From there, push off with your arms and pop your knee onto their chest (or belly, depending on their defence). The knee should ideally be pointing towards their far shoulder, keeping your toes off the floor to maximise the amount of weight on your partner. Your other leg should be out at a 45 degree angle, making sure that it isn't easy for them to grab it. Be sure to also keep that leg bent, as otherwise you're liable to lose balance when they move.
Keep your hips as low as possible, meaning you end up sitting on them, but with your bum off to the side of their body. You're going to use the arm that is gripping their collar to do a variation on the cross-face. Keep that arm stiff, pressing into their face. That should make it difficult for them to turn their head.
A simple attack from there is an armbar from knee-on-belly. Having got your knee in place, the natural reaction of your partner is often to push on that knee with their hand. It's painful, so shoving with the hand is the immediate response to get rid of all that pressure. However, this also frequently means that there will now be a gap by their elbow.
You can take advantage of this by feeding your hand through (on the inside). Wrap your hand around their tricep and pull in tight with your arm. That should now mean you can squash their arm against your shoulder. Also bring your head next to their arm, for extra control. Put your hand by their head, then step your leg over their head.
Having trapped their arm, you can now spin all the way to the other side to go for an armbar. Many people make the mistake of not spinning far enough, so lose the armbar. To prevent that, grab their trouser leg to help pull yourself round: you want to be facing the opposite wall, making a complete spin. Finally, drop back and go for the armbar, squeezing your knees together.
________________
Teaching Notes: This is a simple technique, though personally I pretty much never go to knee on belly. Things to emphasise would be reaching right through and gripping the tricep, staying tight with your head and going slowly on the spin until you get used to the mechanics and knee entry. Getting that knee in the right place is possibly the hardest part, especially doing it smoothly. Next time, I should also mention the trouser leg grab, I forgot to mention that. Handy tip from Nic G, IIRC. :)
I think this will work well as a combination of maintaining knee on belly and the armbar, they seem to fit together. So, next time I'll do it as a combination class, with a load of drills for knee on belly (press up into KoB from mount, side to side, then into the armbar. Maybe an escape drill too?)
09 March 2016
09/03/2016 - Teaching | Side Control | Maintenance (Hip to Hip)
Teaching #476
Artemis BJJ (MYGYM Bristol), Can Sönmez, Bristol, UK - 09/03/2016
Today, I wanted to emphasise mobility in side control as well as focused pressure, again drawing on John Palmer's excellent 'control point theory'. Although it can be tempting to just seize up in side control, you have to keep moving. Otherwise, you aren't reacting to your opponent and they're eventually going to escape. The old "it's better to bend than to break" cliche comes to mind.
 That transitional, mobile element to side control can be seen in Saulo's hip-to-hip side control, which he shows on Jiu Jitsu Revolution. He keeps his hip stuck right by theirs throughout. The only time he lets off the pressure is if he gets something better, like strong control on the far arm. As they move, turn and put your other hip to theirs, following them around with your legs sprawled back. Your elbow is across, blocking their other hip: however, be careful of pinching that in too forcefully, as that may help them initiate an escape where they roll you over the top. Also, don't rest your elbow on the mat. Putting the elbow on the mat takes your weight off them, pinch it into their far hip instead.
 Your weight should constantly be on them, because of that sprawl: don't touch the floor with your legs or knees. You can also reverse, which Saulo's brother Xande discusses in detail on his DVD set. Turn your hips in the other direction, so that you're now facing their legs. Control their far arm, also making sure to block their near hip to prevent their movement in that direction. As you turn, it's worth blocking their legs with your arms, as well as clamping your head to their hip.
My favourite way to practice this is using the 'no hands' maintenance drill, explained in the video:
_____________________
Teaching Notes: I can't think of anything to add here, but then I might be forgetting something, as I'm writing this up after returning from Amsterdam. ;)
09/03/2016 - Teaching | Women's Class | Side Control Escape to Knees
Teaching #475
Artemis BJJ (MYGYM Bristol), Can Sönmez, Bristol, UK - 09/03/2016
For the escape to the knees, Roy Dean is a useful reference point, so I'll be drawing on his method from Blue Belt Requirements as usual. It begins in much the same way as the shrimp back to guard. First thing to note is that they will want to kill your near arm. This is bad for you, because it means you can't stop them shifting up towards your head. From there, they can make as much space as they want and pass to mount.
 So, you need to get your arm inside, the forearm pressing against their hip: this is a bit more reliable that grabbing the gi material, as they can potentially still bring their body onto your hand and collapse it due to the loose material. The forearm into the hip will help block their movement, and initiate your attempts to create some space. It should also help you block them moving to north south, as if you clamp your arm by their side, your body will move with them if they try to switch position.
One thing to note is that having your forearm by their hip like that does leave you more open to the cross-face. So, you could potentially block inside their cross-facing arm instead, which will prevent their shoulder pressure. This is the Saulo method from his book, which has advantages, but personally I prefer to block the hip.
With your other hand, grab the gi material by their shoulder, close to their neck, then pull down. Twist that arm up into their neck, keeping the elbow in: you need to be tight here, as otherwise they will go for a figure four on that arm. Once you've got the forearm into their neck, they can't press down into you, as they'll essentially be choking themselves. Note that this is a block: you don't want to start pushing and reaching, as that may leave you vulnerable. Reach too far and they can shove your arm to one side and set up an arm triangle.
Next I moved on to the legs. Your legs have two main purposes here: first, blocking your opponent getting to mount. Raise your near knee and drive it into their side. The idea is to wedge them between your knee and the arm you have by their hip. Personally, I like to keep my knee floating, glued to their side.
Many people prefer to cross their foot over their knee, which is something I used to do in the past as well. However, as this long Sherdog thread discusses, that can leave you open to a footlock, and also limit your mobility. Then again, you can see it used at the highest levels, like here at the Mundials.
The second use for your legs is bridging. Marcelo Garcia has a handy tip for this (although the escape he is doing there is slightly different), related to increasing the power of your bridge. To do that, bring your heels right to your bum, then push up on your toes. That increases your range of motion, so you can really drive into them.
Make sure you turn into them as you bridge, rather than just straight up. This will help the next part, which is to shrimp out as you come back down. That's why you've created space in the first place: if you simply plopped back down, then you've wasted the opportunity.
After you bridge and shrimp, rotate the arm you have by their neck under their armpit, then reach for their legs or around their back. Roy Dean then shifts out to the side, ending up crouched next to them (as in the picture): I find that's the most intuitive method. At the same time, bring your bottom leg under your top leg, reaching further around their back as you fully turn to your knees. It's the same motion as the shrimp to knees drill I do during the warm-up.

From there, reach for the far knee and drive forward, moving to the top position. Another typical method leaves you square on, but I personally am not keen on that position as I find it is more awkward to crawl up into a strong base from there. However, again, it is a totally valid variation: experiment to see what works best for you.
________________
Teaching Notes: Nice and simple, no issues I can think of with this one. We also ran through some knee on belly, as I wanted to test out teaching the knee on belly armbar. My aim is to make that into a drill, so we'll see how easy it is for beginners to pick up. :)
08 March 2016
08/03/2016 - Open Mat | International Women's Day
Class #701
Artemis BJJ (MYGYM Bristol), Open Mat, Bristol, UK - 08/03/2016
Small class today after kettlebells, but that did include Tracey, appropriately for International Women's Day. I practiced some knee on belly, got in a bit of rolling, along with answering a few questions Tracey had about training. This time last year, it was the Equality Now GrappleThon: for 2016, we're going to be rolling for One25, a small local charity that helps vulnerable women rebuild their lives. Fundraising is going well, having passed the £2,000 mark a little while ago: if you'd like to help us reach £3,000, head here! :D
07 March 2016
07/03/2016 - Teaching | Side Control | Basic Maintenance
Teaching #474
Artemis BJJ (MYGYM Bristol), Can Sönmez, Bristol, UK - 07/03/2016
As ever, I kicked off with the conceptual framework John described to me in Texas: the primary control points are the hips and the triangle of shoulders and head, secondary control is inside the knees and elbows, then finally tertiary control relates to the wrists and ankles. John goes into more detail over on this thread. I think it's helpful to have that framework at the start, as then the students can hopefully see how that principle filters through everything we'll be training today.
A particularly effective method of control is applying a cross face. If you're not familiar with the term, that means bringing your near side arm under their head: I like to reach right to their far armpit and anchor my arm there, either by cupping, or by getting a hold of the gi material. From that position, you can then drive your shoulder and/or arm into the side of their head or neck, aiming to get their head to turn away from you and/or generate some choking pressure to distract them.
If they can't turn their head back towards you due to the shoulder pressure, it will make it much harder for them to create space and escape. "The body follows the head" or "where the head goes, the body follows" is an old adage and a true one. This is what SBG call the 'shoulder of justice.' If you shift your shoulder from their face to their neck, that choking pressure can also open up opportunities to switch to mount or consider initiating a submission attempt. However, it does mean they can probably turn their head again, which improves their escape opportunities.
Next, it is a good idea to deal with their far arm. Reach under that far elbow with your arm, coming under the armpit. You have a couple of options here. Option one is linking your hands together with a gable grip and sucking them in towards you, providing a very tight side control. This is how Tran showed it to me several years ago. Option two is gripping around their shoulder, to bring their shoulder off the mat: this is something Dónal likes to do, which isn't surprising as I think I first saw that on a Braulio video. You can also use the elbow of your far arm to squeeze into their far hip. This latter option makes more sense if you're already grabbing by their armpit with your near arm. You want to keep control over their far arm for two reasons: first, they can use it to defend, by getting it into your neck. Second, there are a number of attacks you can do from here.
I also wanted to emphasise chest position. Picture an imaginary line between the middle of their chest and also between yours. You want to bisect those lines: don't be too far over them, or they can easily roll you (if they DO try and roll you and it's working, put your far arm or your forehead out for base). Too far back, and it's easier for them to slip out and escape. Stay low, dropping your hips: don't leave them any space.
Moving on to the legs, there are a bunch of different things you can do. I used to prefer to bring both knees in tight, but I later started sprawling the leg nearer the head backwards, which enables me to bring my hips much lower. This is key: you must keep your hips low in side control. If your knees are in tight, widen them if your hips are still high.
The lower the hips, the more weight on top of them, which therefore gives you better control. However, if you have both legs sprawled back, there is a chance they might be able to bring their knee inside: you need to block it somehow, which would commonly be with the hip nearest their legs, your hand or your knee. Play around and see which position you like, and also be ready to switch depending on your partner's movement. Finally, if you're sprawling your legs back, keep your knees off the ground and stay on your toes. This helps with mobility and driving forward.
________________
Teaching Notes: It's perhaps not the most exciting lesson, but I think it's important to cover off these principles. There are still people with their hips too high, or sprawling back but with knees on the floor, as well as cross faces that need to be heavier. Nevertheless, I'll keep thinking about how I could add something to the lesson. Perhaps something really simple, like an americana? Then again, then might be needlessly fiddling with something which already works well: I need to get some feedback from students, so will make a point of asking them about this particular lesson (though feedback is always welcome :D).
Artemis BJJ (MYGYM Bristol), Can Sönmez, Bristol, UK - 07/03/2016
As ever, I kicked off with the conceptual framework John described to me in Texas: the primary control points are the hips and the triangle of shoulders and head, secondary control is inside the knees and elbows, then finally tertiary control relates to the wrists and ankles. John goes into more detail over on this thread. I think it's helpful to have that framework at the start, as then the students can hopefully see how that principle filters through everything we'll be training today.A particularly effective method of control is applying a cross face. If you're not familiar with the term, that means bringing your near side arm under their head: I like to reach right to their far armpit and anchor my arm there, either by cupping, or by getting a hold of the gi material. From that position, you can then drive your shoulder and/or arm into the side of their head or neck, aiming to get their head to turn away from you and/or generate some choking pressure to distract them.
If they can't turn their head back towards you due to the shoulder pressure, it will make it much harder for them to create space and escape. "The body follows the head" or "where the head goes, the body follows" is an old adage and a true one. This is what SBG call the 'shoulder of justice.' If you shift your shoulder from their face to their neck, that choking pressure can also open up opportunities to switch to mount or consider initiating a submission attempt. However, it does mean they can probably turn their head again, which improves their escape opportunities.
Next, it is a good idea to deal with their far arm. Reach under that far elbow with your arm, coming under the armpit. You have a couple of options here. Option one is linking your hands together with a gable grip and sucking them in towards you, providing a very tight side control. This is how Tran showed it to me several years ago. Option two is gripping around their shoulder, to bring their shoulder off the mat: this is something Dónal likes to do, which isn't surprising as I think I first saw that on a Braulio video. You can also use the elbow of your far arm to squeeze into their far hip. This latter option makes more sense if you're already grabbing by their armpit with your near arm. You want to keep control over their far arm for two reasons: first, they can use it to defend, by getting it into your neck. Second, there are a number of attacks you can do from here.
I also wanted to emphasise chest position. Picture an imaginary line between the middle of their chest and also between yours. You want to bisect those lines: don't be too far over them, or they can easily roll you (if they DO try and roll you and it's working, put your far arm or your forehead out for base). Too far back, and it's easier for them to slip out and escape. Stay low, dropping your hips: don't leave them any space.
Moving on to the legs, there are a bunch of different things you can do. I used to prefer to bring both knees in tight, but I later started sprawling the leg nearer the head backwards, which enables me to bring my hips much lower. This is key: you must keep your hips low in side control. If your knees are in tight, widen them if your hips are still high. The lower the hips, the more weight on top of them, which therefore gives you better control. However, if you have both legs sprawled back, there is a chance they might be able to bring their knee inside: you need to block it somehow, which would commonly be with the hip nearest their legs, your hand or your knee. Play around and see which position you like, and also be ready to switch depending on your partner's movement. Finally, if you're sprawling your legs back, keep your knees off the ground and stay on your toes. This helps with mobility and driving forward.
________________
Teaching Notes: It's perhaps not the most exciting lesson, but I think it's important to cover off these principles. There are still people with their hips too high, or sprawling back but with knees on the floor, as well as cross faces that need to be heavier. Nevertheless, I'll keep thinking about how I could add something to the lesson. Perhaps something really simple, like an americana? Then again, then might be needlessly fiddling with something which already works well: I need to get some feedback from students, so will make a point of asking them about this particular lesson (though feedback is always welcome :D).
Subscribe to:
Posts (Atom)